
User Manual for Tumakuru Smart City GPMS Transportal:
GPMS Transportal User Roles:
- Admin user: Can view all projects, project statuses, employees, user activities, uploaded documents, reports, and create master data. Approves projects created by Enterprise Head users.
- Organization Head: Can create and edit projects, manage tasks, upload documents, and raise complaints.
- Policy Admin: Can create users/employees but has no project access.
- Stakeholder: Can view project details and upload bills.
- Case Worker: Verifies bill details, enters deductions, and prepares cheques.
- Assistant Engineer: Approves or rejects bill details.
- Assistant Executive Engineer: Approves or rejects bill details.
- Executive Engineer: Approves or rejects bill details.
- Chief Engineer: Approves or rejects bill details.
- Chief Accounts Officer: Approves or rejects bill details and instructs case workers to prepare cheques.
- Joint Managing Director: Approves or rejects bill details.
- Managing Director: Approves or rejects bill details and finalizes cheque approvals.
User: Organization Head
The user will have access to:GPMS Module(GLOCAL PROJECT MONITORING SYSTEM) – for creating and editing projects and its status
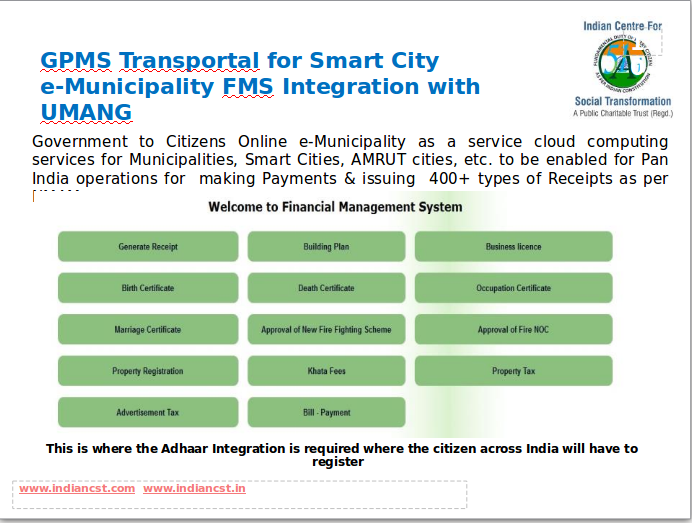
FMS Module(FINANCIAL MANAGEMENT SYSTEM) – for generating various municipality receipts
DMS Module(DOCUMENT MANAGEMENT SYSTEM) – for document management
Smart Cities Module: The information of all the Smart Cities are visible
Steps:
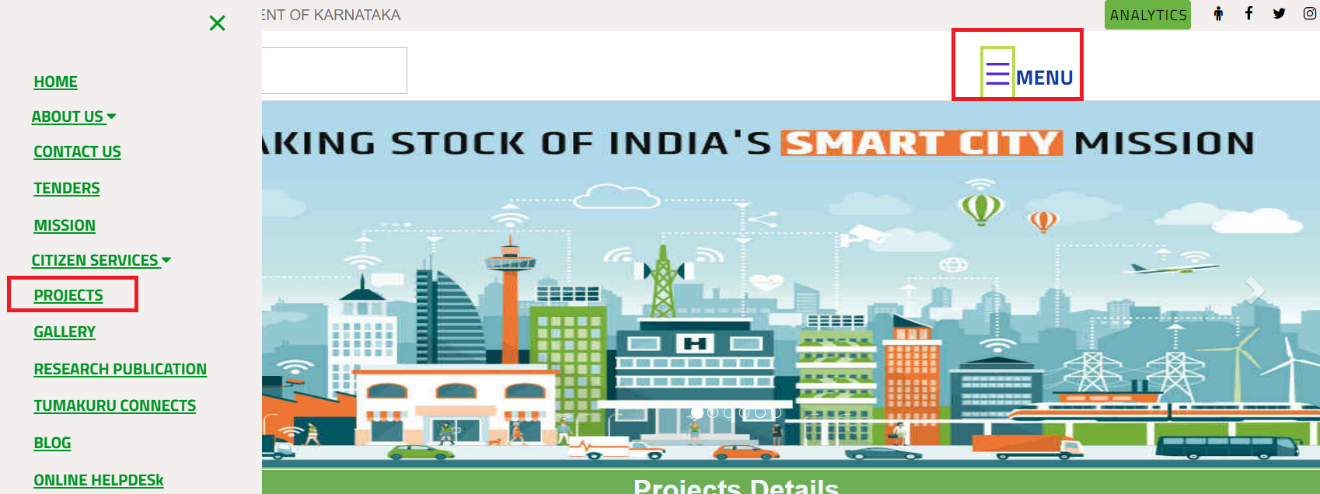
Visit http://www.smartcitytumakuru.in/ and click on the menu PMU for the Tumakuru Smart City GPMS Transportal.
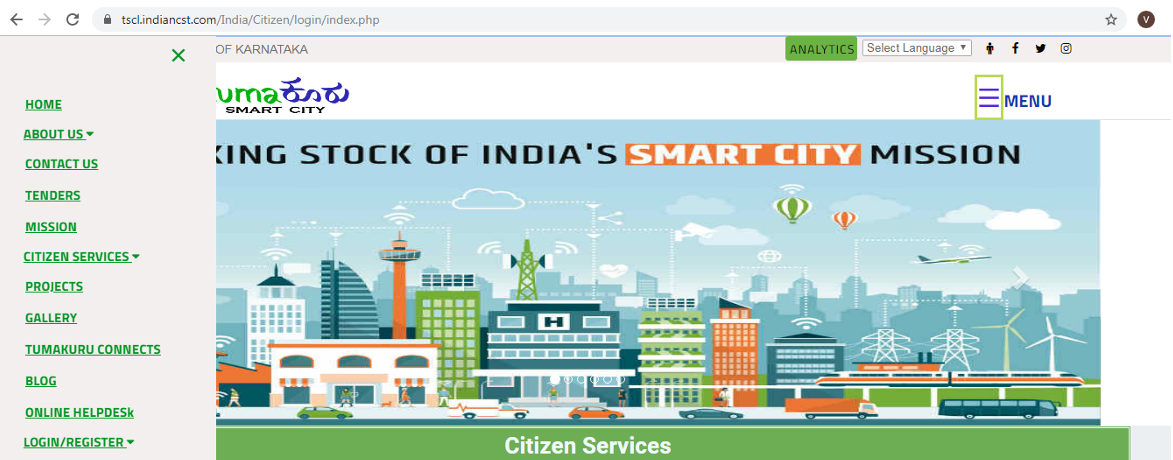
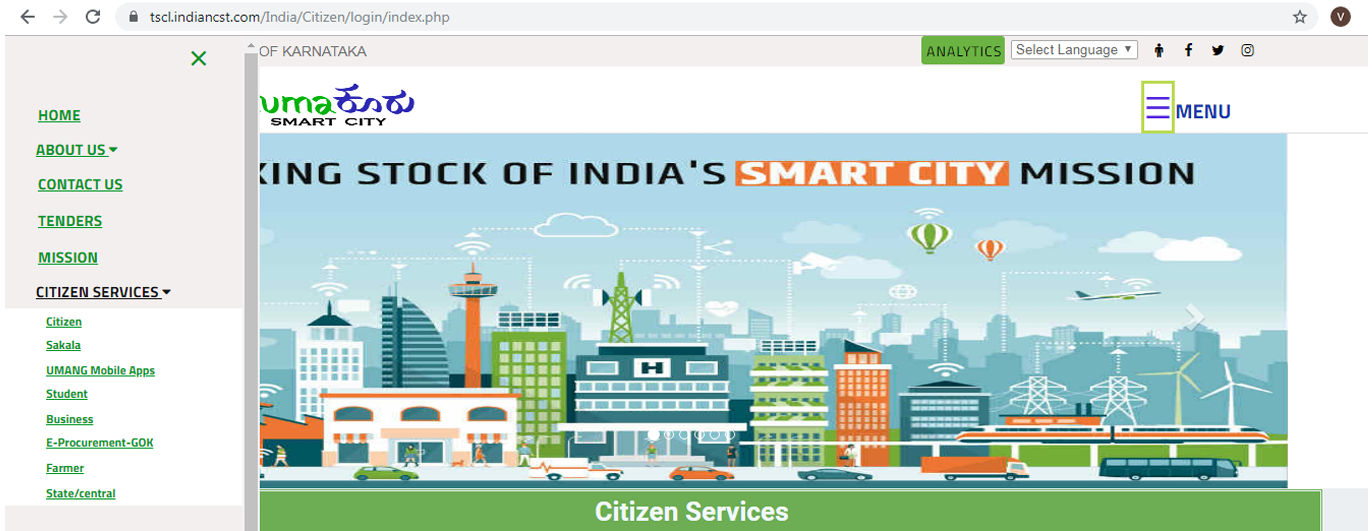
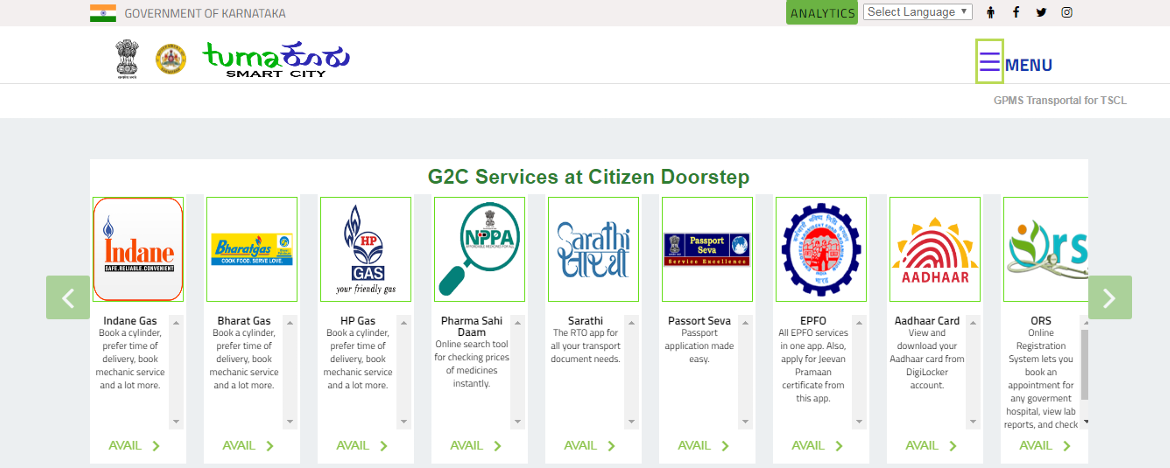
Citizen Services
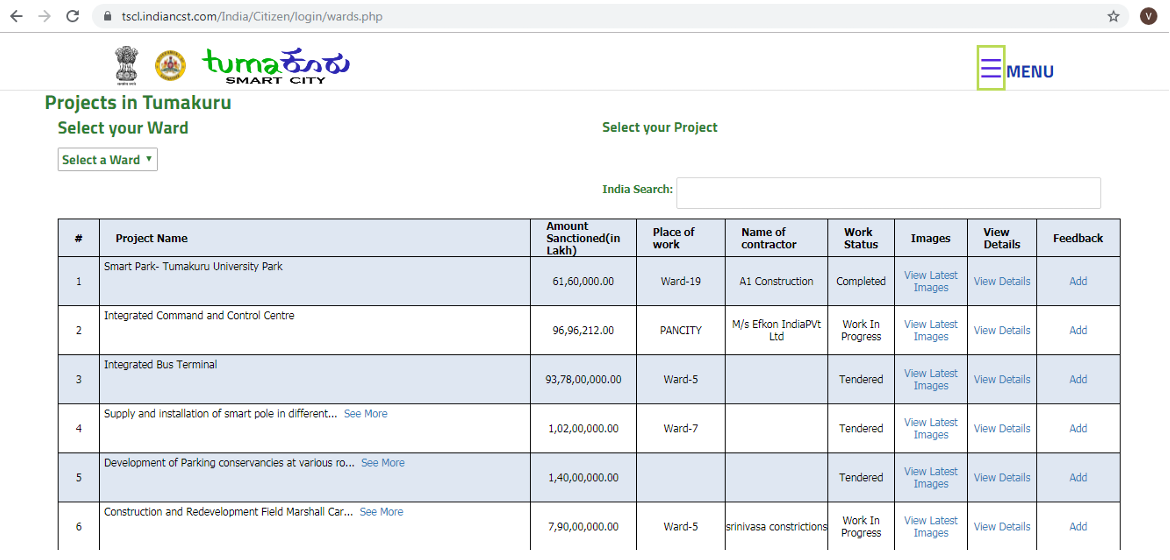
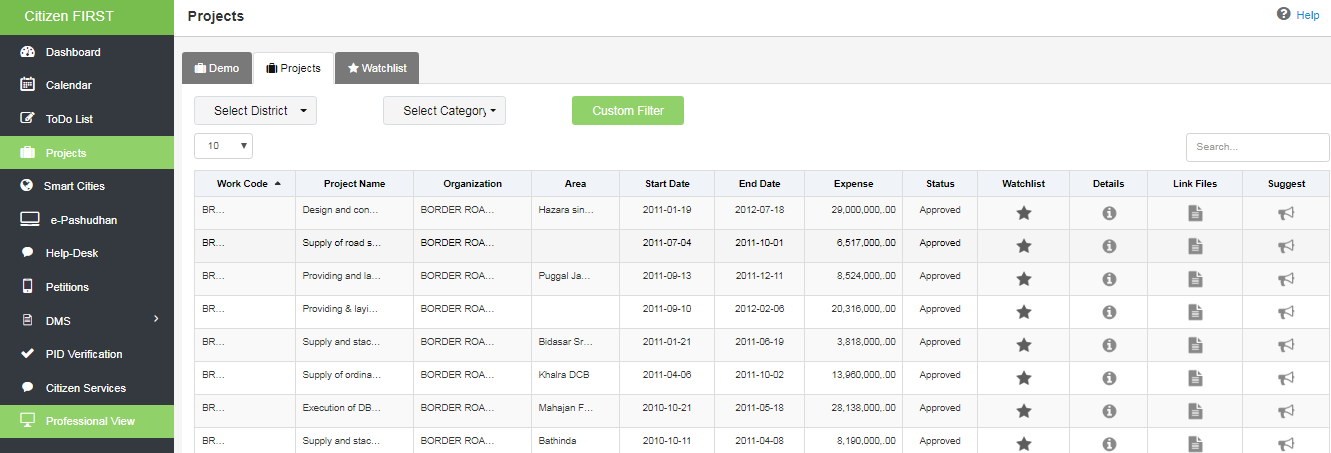
Projects
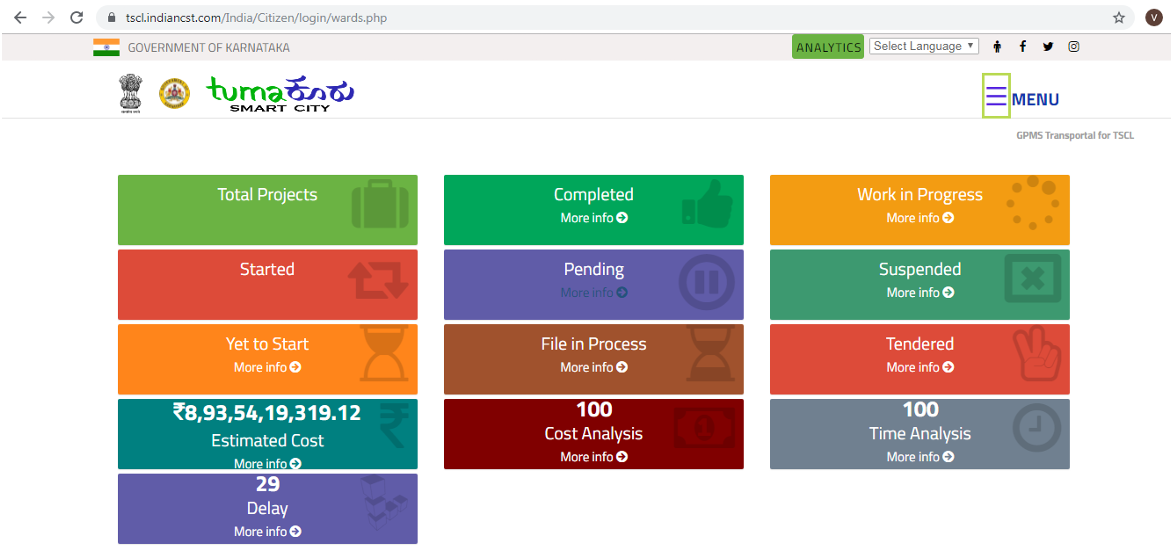
The columns Reason for Delay and Number of Days Project Delayed have been added, the values are being auto-filled.
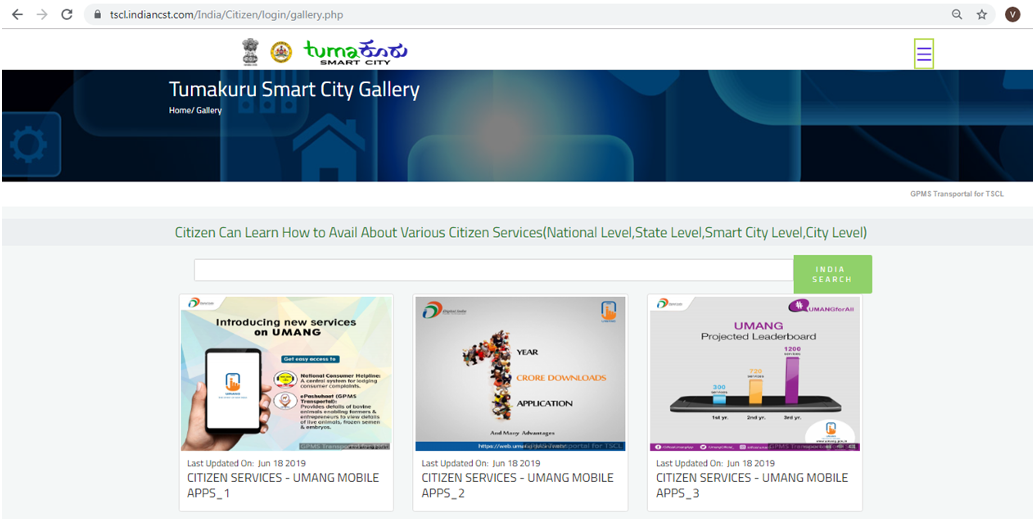
Gallery
Features of Gallery Module- Organizational Head Group Users can upload/post any of documents, images, audio and video using their login. All the posts will be visible only to Admin User Login.
- Only Admin user can approve/disapprove the posts and he can activate the latest/needed one in the Edit link of a particular post, using his login credentials.
- The approved posts will be visible in the Gallery section in the Home Page of TSCL GPMS Transportal.
- Search option is enabled for quick retrieve in the Home page.
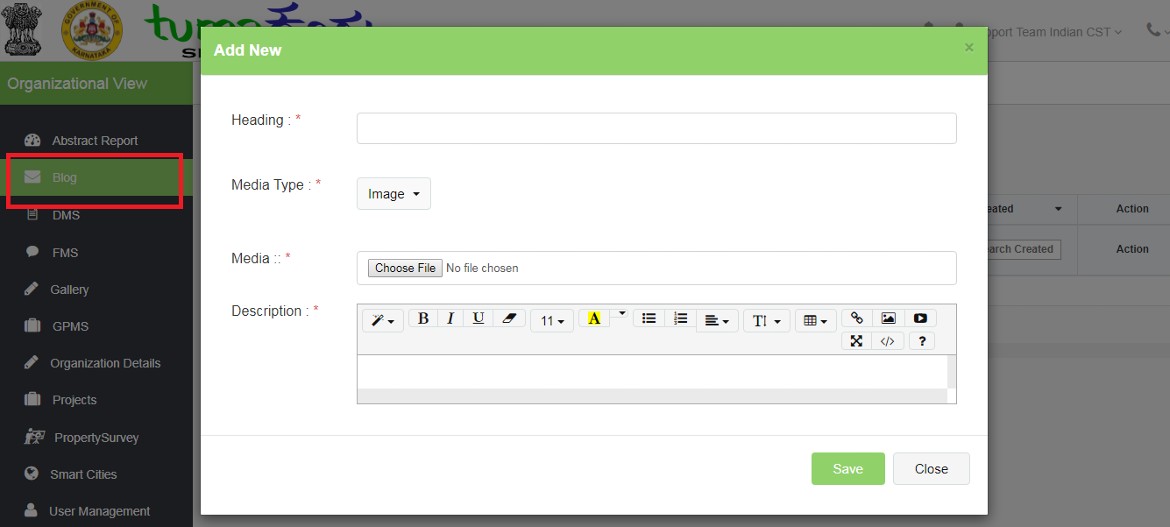
Blog
Blog Features:- Organizational Head Group Users can upload/post any of documents, images, audio and video using their login. All the posts will be visible only to Admin User Login.
- Only Admin user can approve/disapprove the posts and he can activate the latest/needed one in the Edit link of a particular post, using his login credentials.
- The approved posts will be visible in the Gallery section in the Home Page of TSCL GPMS Transportal.
- Search option is enabled for quick retrieve in the Home page.


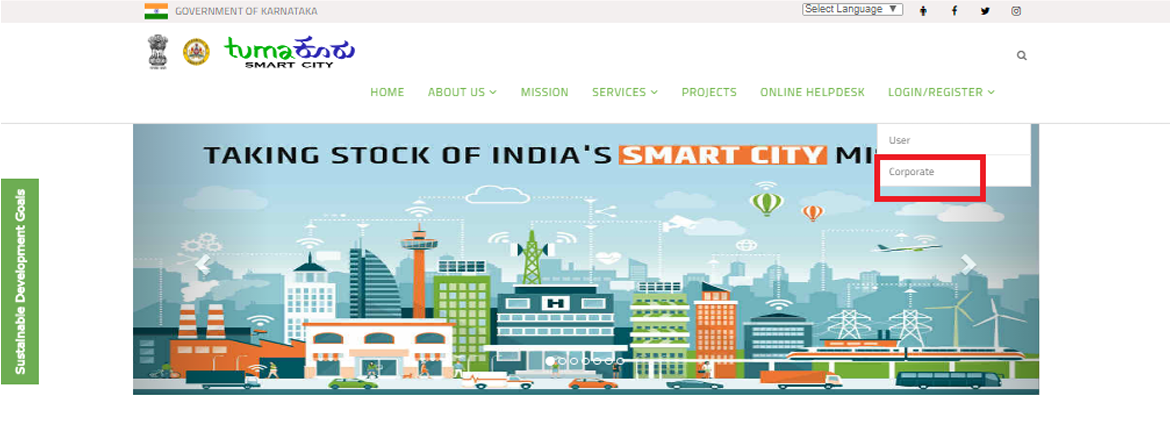
Corporate User Login
Click on LOGIN → CORPORATE
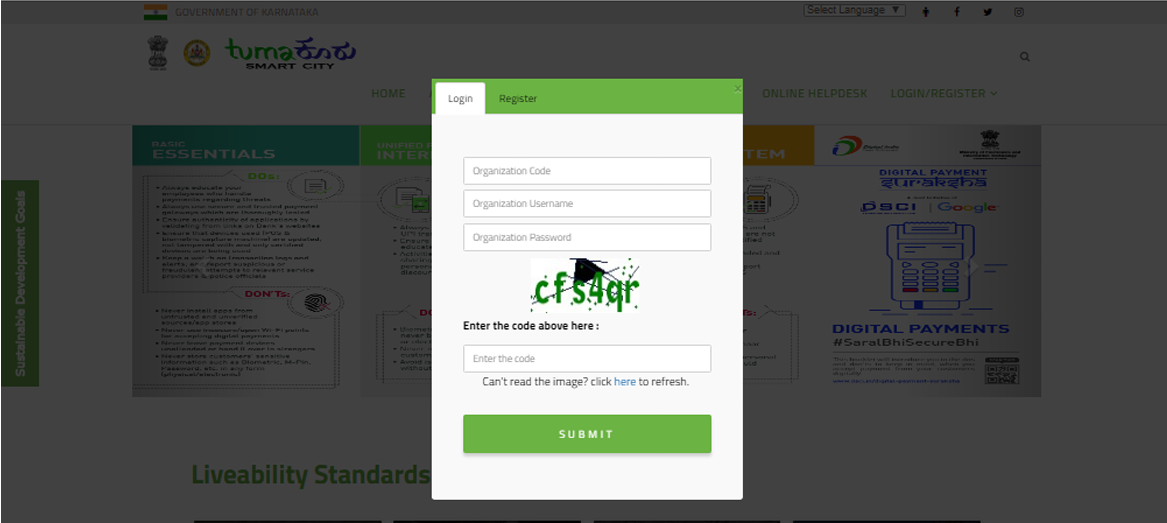
Corporate Users are registered for an organization with assigned Organization Code, Username and Password
Provide values for Organization Code, Username, Password, CAPCHA value, click on SUBMIT button

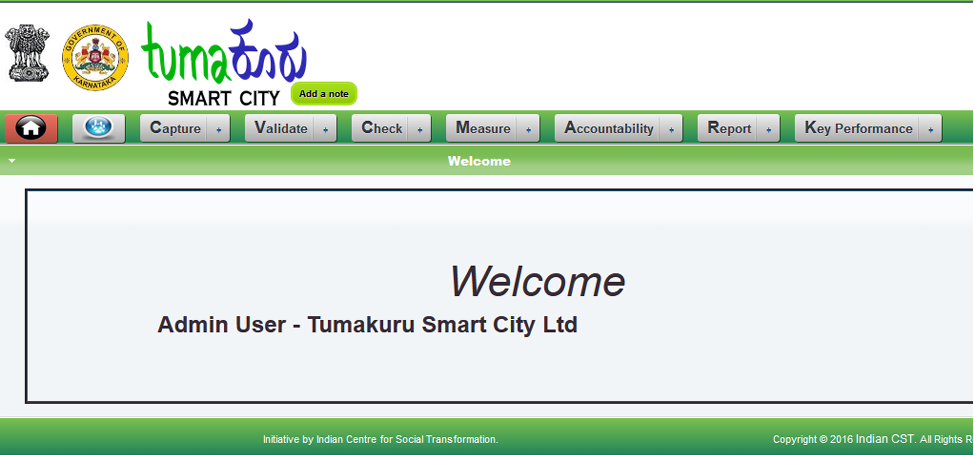
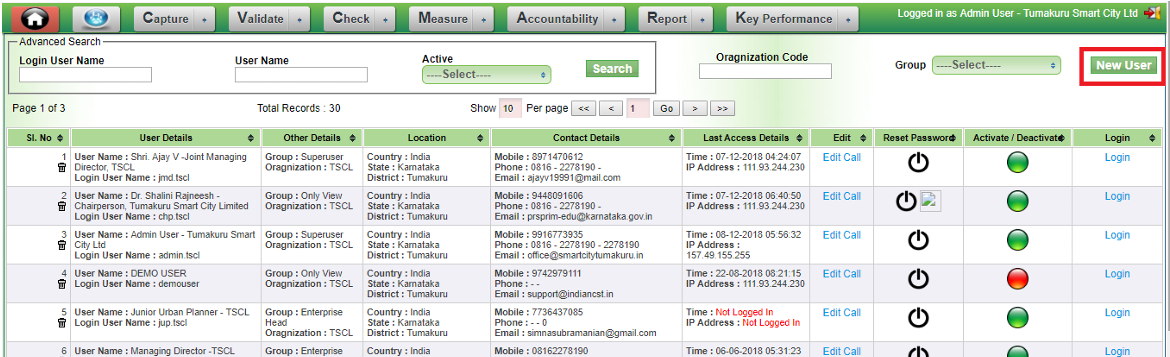
Admin User Features
Features available for Admin User:- Masters: The user can Create Master data for Organization, Organization Users, Departments, Designations and Categories and also can view Master data such as the Organizations, Employees, Department details, Designations and Category.
- Organizations:Create Organizations (Stakeholder/Contractor), registers employees (Contractors/Stakeholder)
- Generating Project Code: The user can generate Project Code by providing the needed information of the Project.
- Once the user generates the Project Code, Approval has to be obtained by his/her higher authority.
- Once his/her Project gets approved, the user has to enter additional information of the Project. Project Dashboard will be generated.
- Project Dashboard.
- Uploading Documents against the Project.
- Milestones and Task Management.
- Record Minutes of Meetings.
- Key Performance.
- For any issues, the user can raise the complaint in Helpdesk and also can view the status/response from his higher authorities.
- Reports.
- Notesheet.
- Payment Module
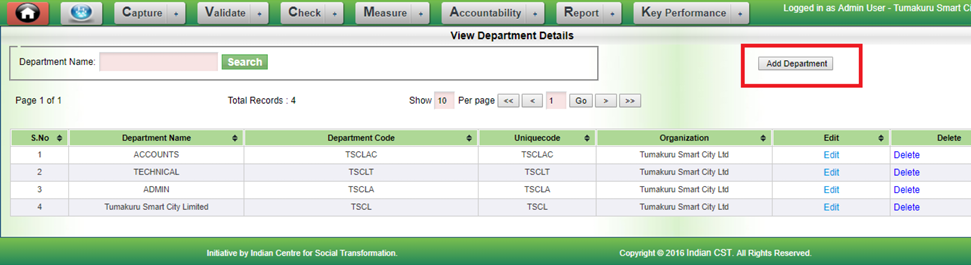
i) Project Dashboard->Capture->Masters->Departments
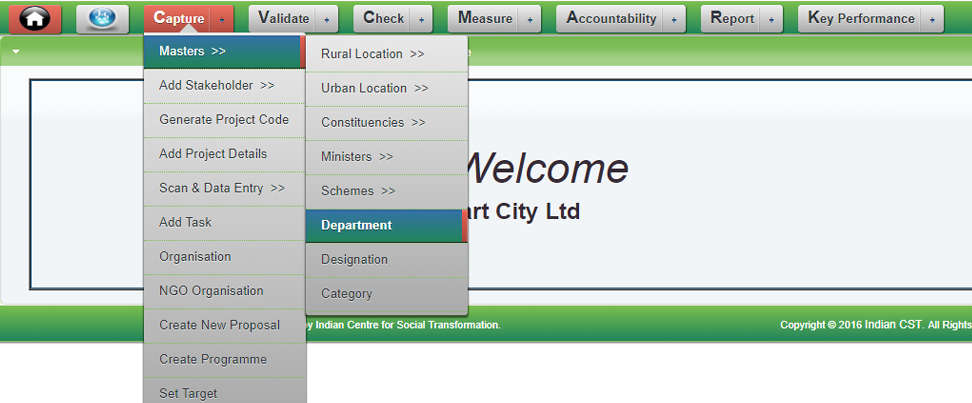
This tab shows the department details and also we can add the new department.
b. Capture->Organization
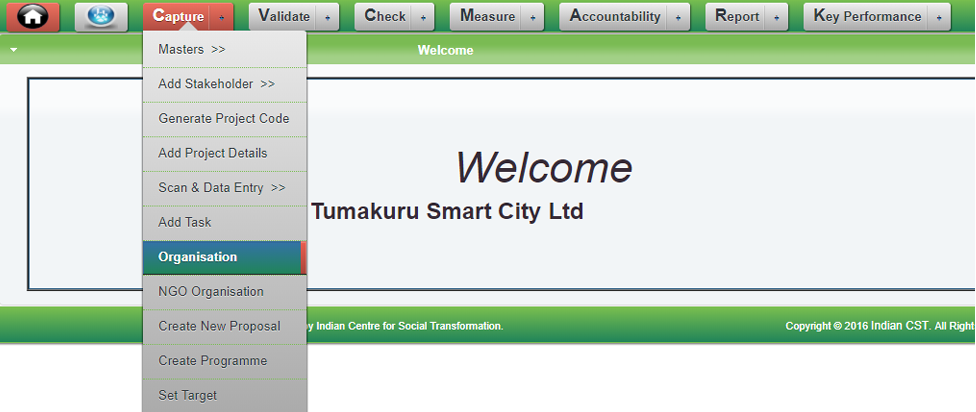
In this tab users can do registration and also view the organization.

c. Generating Project Code:
i) Click on Capture->Generate Project Code
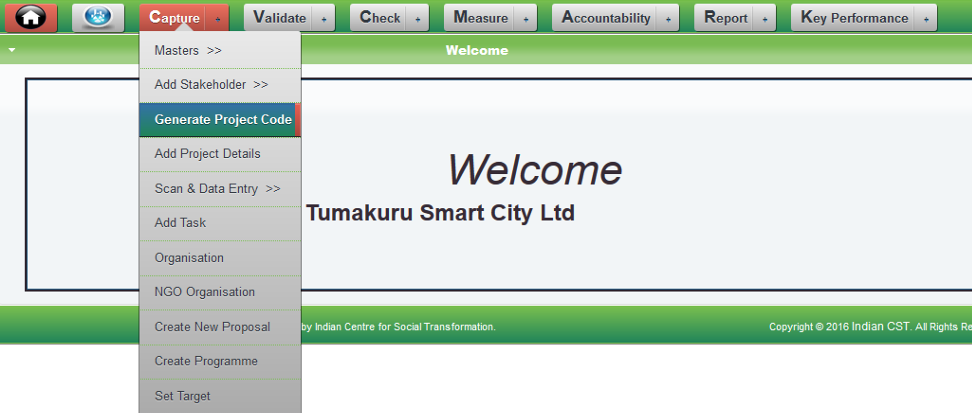
ii)Create new code
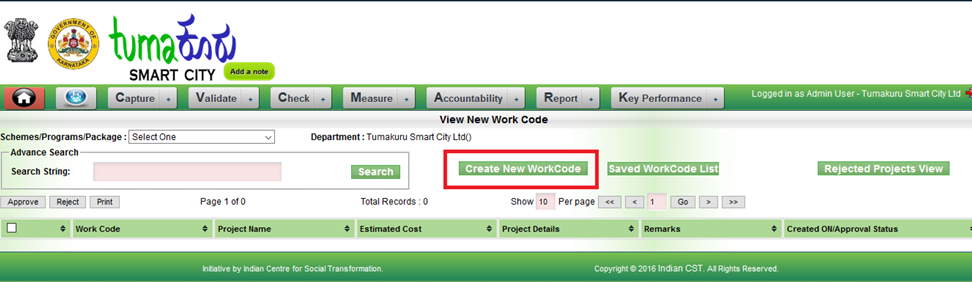
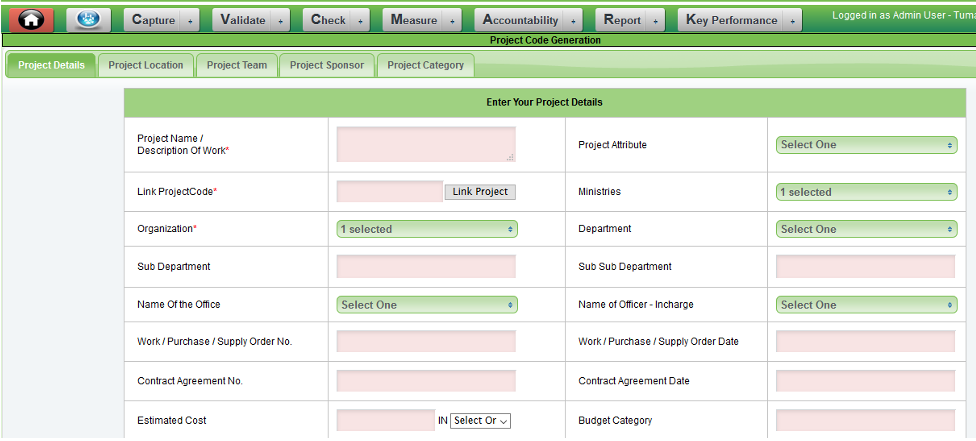
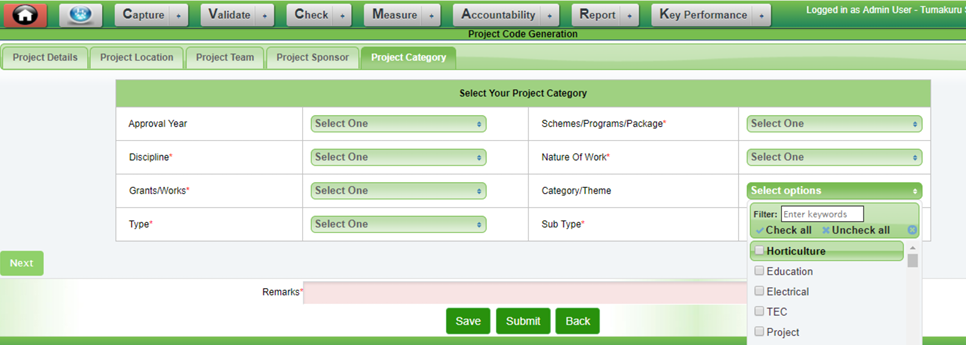
iii) Provide the appropriate values for the tabs Project Details, Project Location, Project Team, Project Sponsor, and Project Category and click on Submit button.
Project Details Tab: The values such as Project Name, Attribute, Ministry, Department, Officer-in-charge, Work Purchase/Supply Order Number, Work Purchase/Supply Order Date, Contract Agreement Number, Contract Agreement Date, Estimated Cost, Investment Cost, Start Date As per Agreement, and End Date as per Agreement.
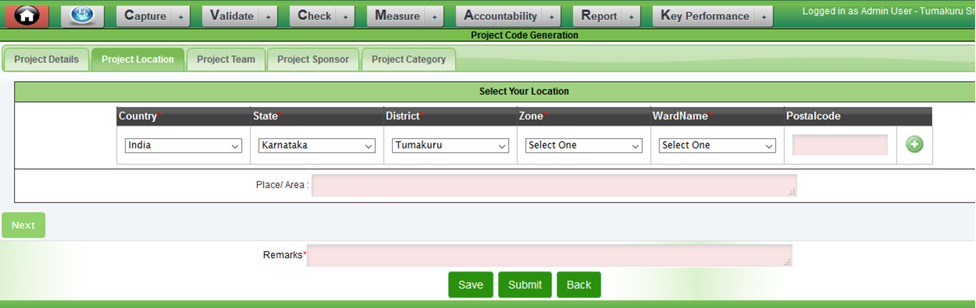
Project Location Tab: Location Details such as Country, State, District, Taluk, Pincode etc., Values has to be provided. Multiple locations of the project which is undergoing can be selected.
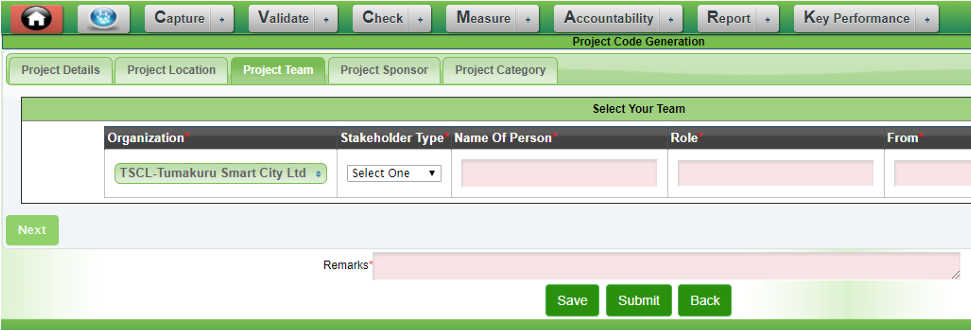
Project Team Tab: This tab is used to capture the stakeholders who are involved in the project. The information such as Type of Stakeholder, Name, Role, From and To has be provided. Multiple stakeholders details can be entered by clicking on + button
Project Sponsor Tab: This tab needs Project’s Sponsors information such as Name of the Sponsor, Name of the Nodal Officer, Contact Number, E-mail Id, Amount and Percentage. Multiple Sponsors’ details can be entered .

Project Category Tab: This tab facilitates in capturing the information such as Approval Year, Schemes/Programs/Packages, Discipline, Nature of Work, Grants/Works, and Category/Theme. Select appropriate values from the list box.
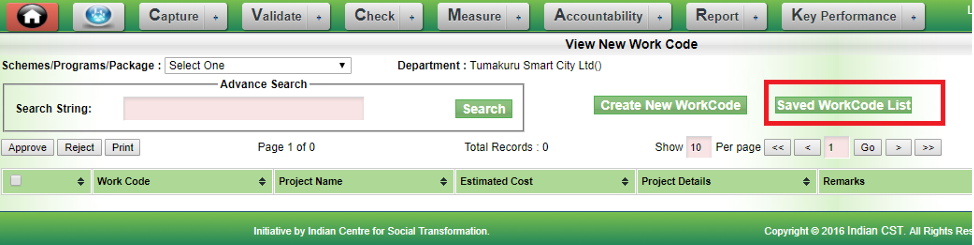
d. Approval for the Project: Once the Project is saved, the project will appear in Saved Project Code List. In case the project is rejected by higher officer, the project will appear in Rejected Project Code list.
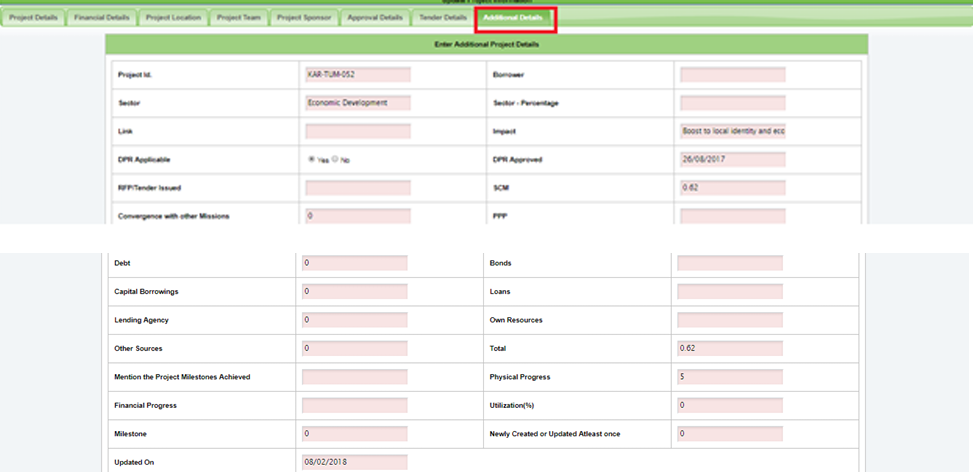
e. Additional Details: Now the user has to provide additional details of the Project such as Project Details, Financial Details, Approval Details, Tender Details and Additional Details. After providing values for all these tabs, click on Submit button
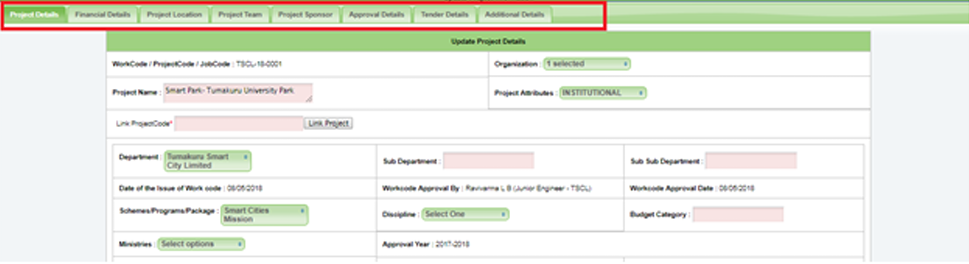
Project Details Tab: This tab contains already provide details, but Project Work Status value has to be entered.

Financial Details Tab: The information such as Expenditure incurred Amount, Approved / Revised Estimated Cost, Awarded Contract Sum, Justified Amount of the tender, Amount Allotted, Commitment Amount, Bid Price of L1 Bidder, Investment Cost, Tender Cost, and Financial Progress of the work (Value of work done till date): has to be provided.

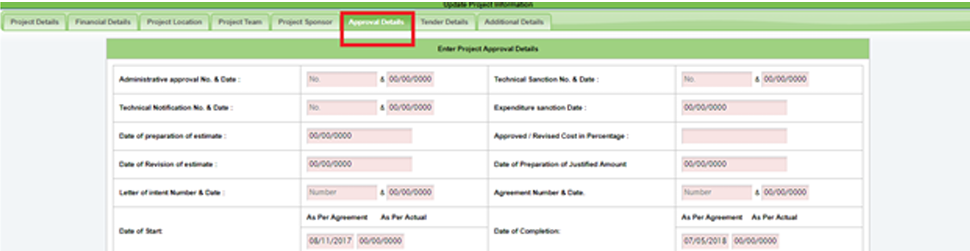
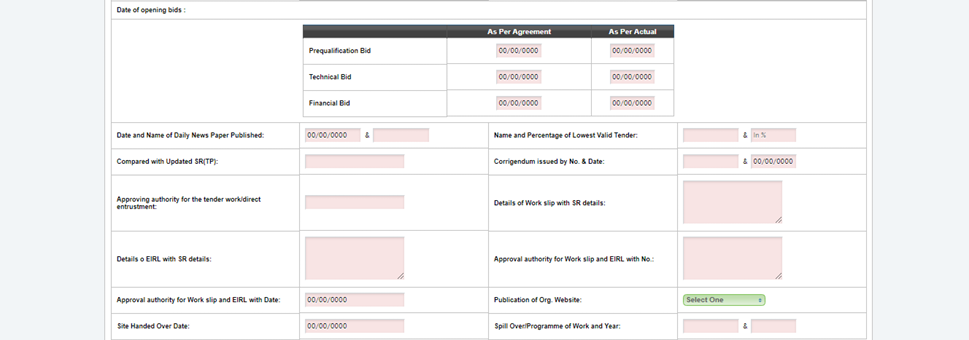
Approval Details Tab: This tab captures data such as Estimate related values, Bids, Approving authority for the tender work/direct entrustment, Approval authority for Work slip and EIRL with Date, etc.
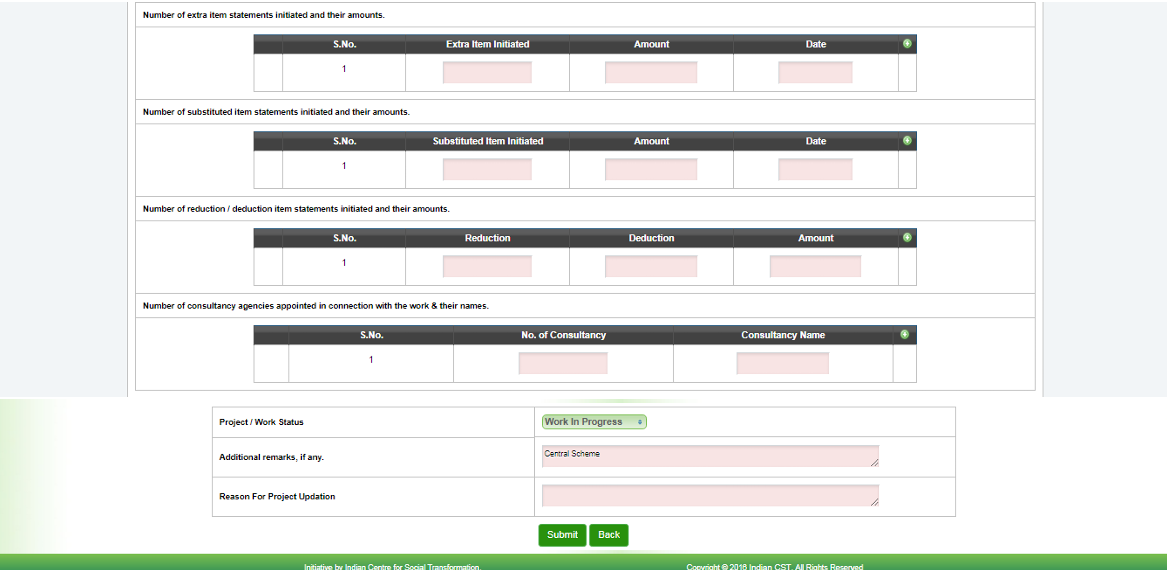
Tender Details Tab: This tab captures the information such as Modes of Tender, Bidders disqualified, Financial Progress, Physical Progress etc.

Additional Details Tab: This tab captures information such as Sector, Impact, DPR, SCM, PPP, Debt, Bonds, Loans, Resources, Lending Agency, Utilization, Milestone etc.,
f. Project Dashboard: Click on Validate->Project List menu
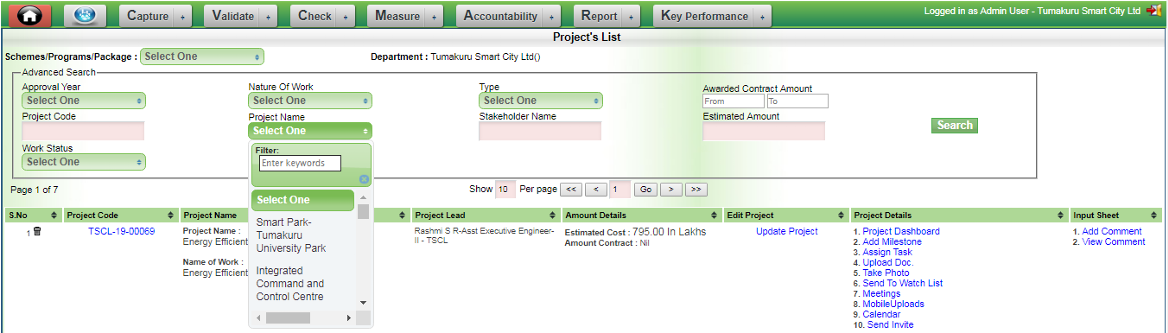
The list of projects created by the user will be listed out. Each Project comes with the features such as View (Project Dashboard), Adding Milestones of the project, Task Management, Uploading Documents against the project, Recording Minutes of Meeting, Mobile Uploads etc.,
By clicking on Update Project link, the user can edit/modify the Project information.
g. Uploading Documents: This feature enables the user to upload various types of documents such as Work Order, Tender, Bills etc.,
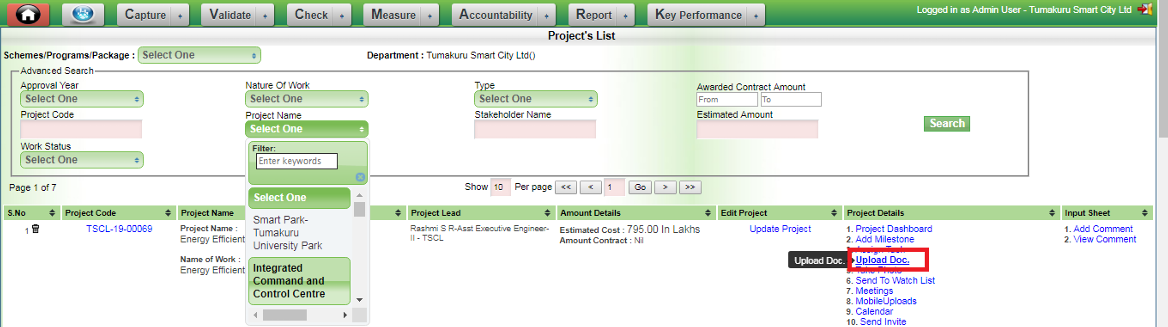
Selects a particular type of documents from the list, Click on Choose File button, select an appropriate file from the saved location and click on Submit button.

The uploaded files can be viewed by clicking on Project Files Tab from the Project Dashboard menu

h.Milestones and Task Management
In GPMS Transportal, Milestones are created against a project.
1. A project can have multiple milestones. Milestone can be created by the Project Manager who is the owner of the project, his/her supervisor or Admin user(appointed by CEO of the organization).
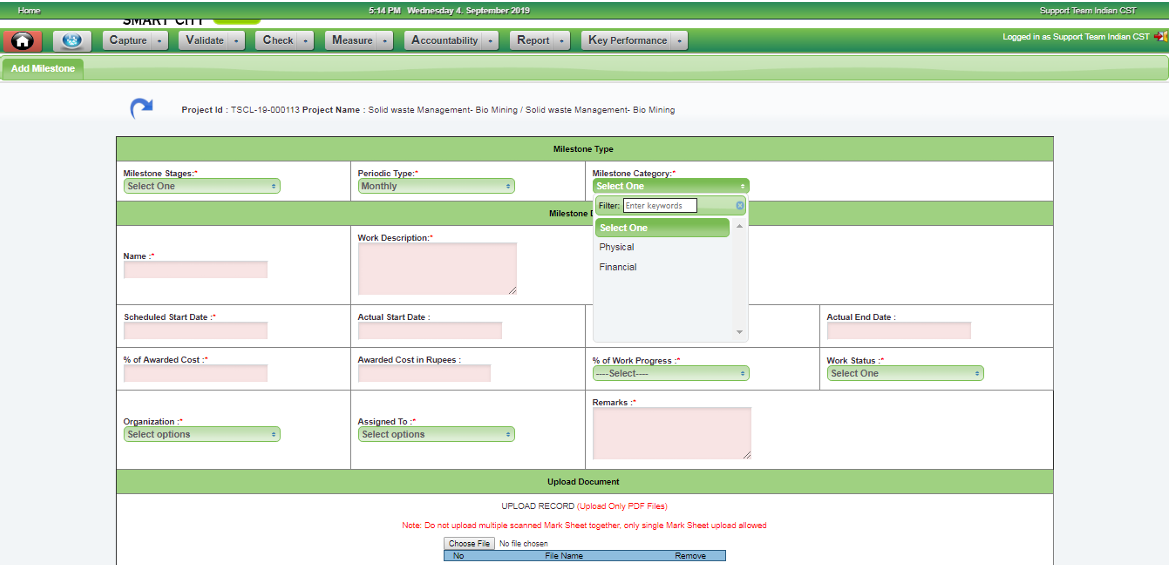
2. A particular milestone against the project considers Milestone Name, Scheduled Start and End Date, Actual Start and End Date, Description, % of Awarded Cost, Priority Status, % of Work Progress, list of employees to whom the milestone is assigned to, Work Status and Upload document feature.
3. One Milestone can have multiple tasks.
4. The Work Status is categorized as Yet to Start, Started, Work-in-Progress, Completed, Suspended and File in Progress.
5. The type of Milestones available in GPMS Transportal is Weekly, Monthly, Intermediary, Risk Management and Problem Task associated with the project.
6. The stages such as THINK, PLAN, DO, CHECK, ACT have been included.
7. Categories such as Physical and Financial have been included.
Adding Project Milestones: Validate->Project List. Click on the link Milestone against the project. As per the need click on Monthly/Weekly/Intermediary tab
Once the user added the Milestone, the tasks related to the milestone can be created.
Click on Task link to create the task against the milestone.

Access Roles
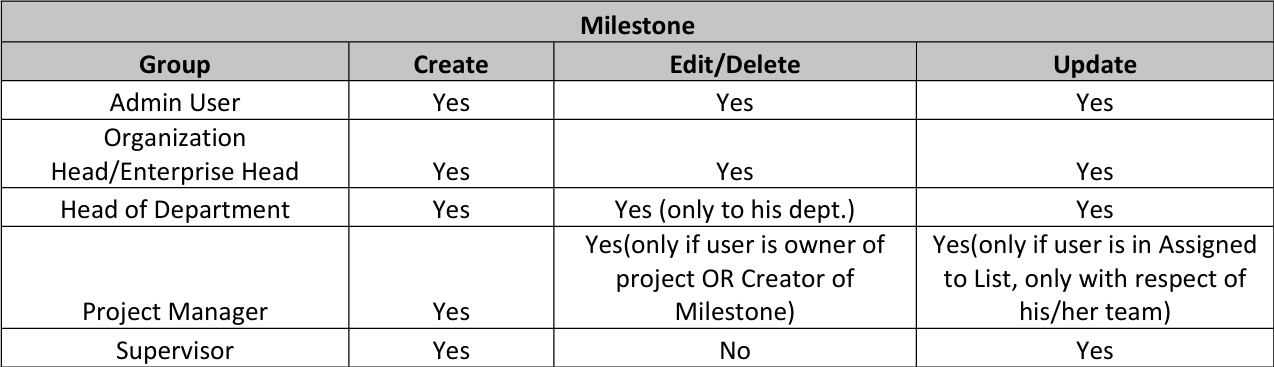
How Milestone Module works
● Owner of the project can create the Milestone and send the details to the supervisor of the project through email to approve or reject.
● The approved milestone will be assigned to his/her project team members and others in the organization, outsourced agents and also to stakeholders outside the organization.
● Assigned user can create and update the Milestone Status and Work Progress. He can upload the document/photos/videos against the Progress of the Milestone. They can add comments on the status shown without deleting/modifying rights.
● Owner of the Milestone can edit the milestone details.
● Owner of the Milestone can create Tasks and assign it to among his/her other project team members.
● Assigned user can only update the Task Status and Work Progress. He can upload the document/photos/videos against the Progress of the Task.
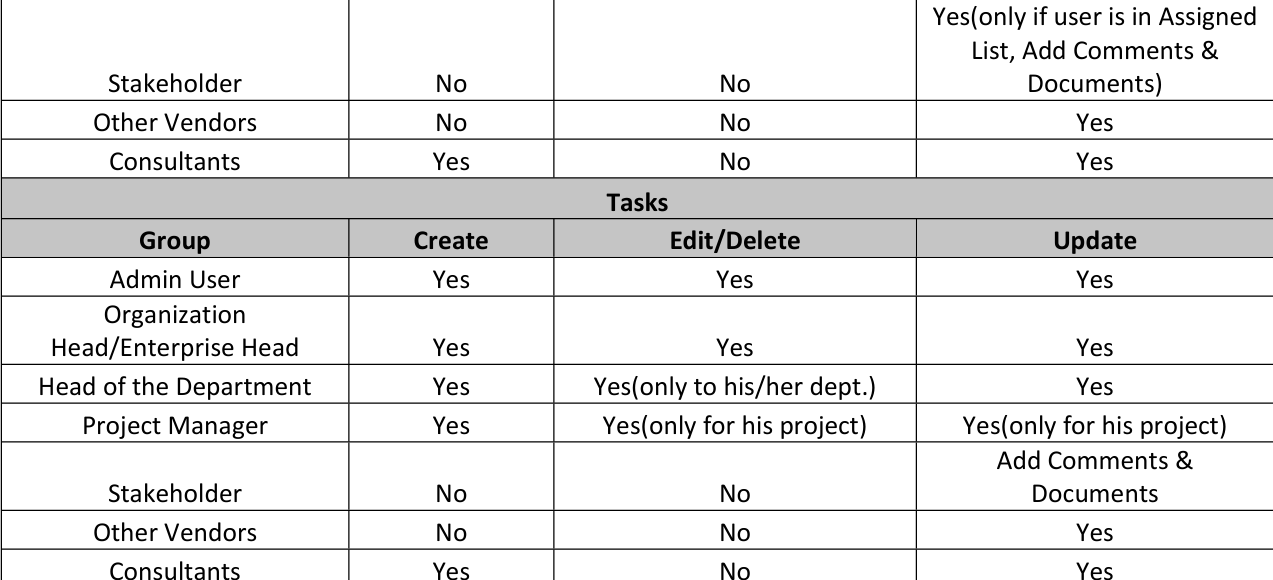
● A stakeholder can see only his assigned Milestones and Tasks.
● A stakeholder can only update the Milestone Status and Work Progress. He can also upload the files.
● A Milestone can be Re-opened by only MD and JMD users.
● File/s can be uploaded against milestones.
● A new task cannot be created under Milestone except by Admin User.
Milestone details through Email
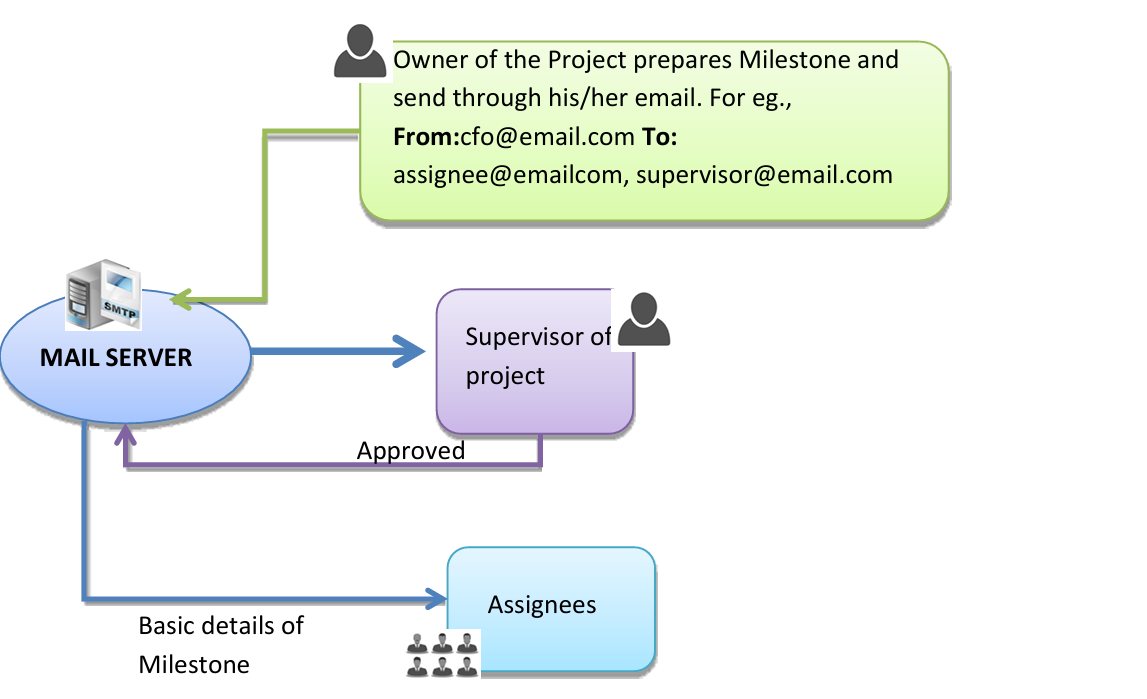
Basic Milestone Details: Milestone Name, Milestone Type, :Milestone Description:, Schedule Start Date, Schedule End Date, Actual Start Date, Actual End Date, Assigned To, user1(user1@email), user2(user2@email) Assigned By, user(user@email), Created At, Priority:
Validations:
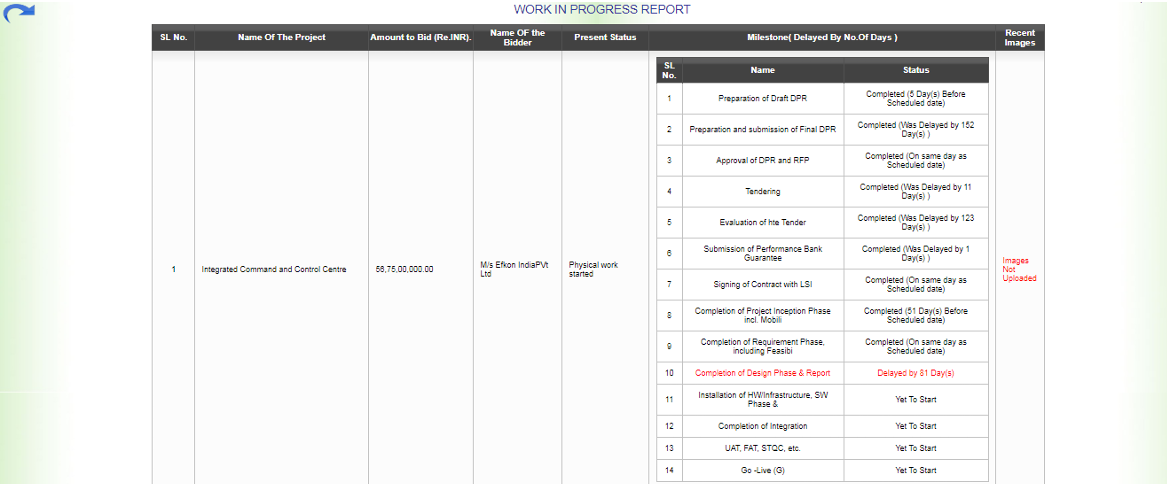
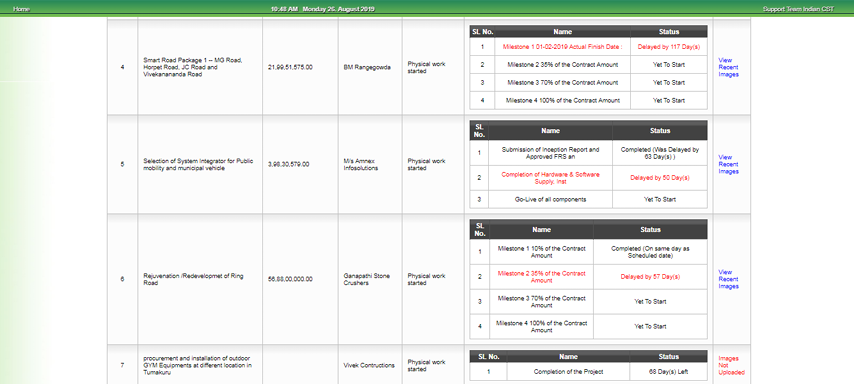
Projects which are Work-in-Progress are monitored and the delays for the completion of the milestones are discussed and proper measures are taken.
The number of days delayed in completing the milestone is calculated based on the Scheduled End Date, and Actual End Date. In case, the milestone is in progress, and beyond the Scheduled End Date, the number of days delayed will be calculated till Current date.
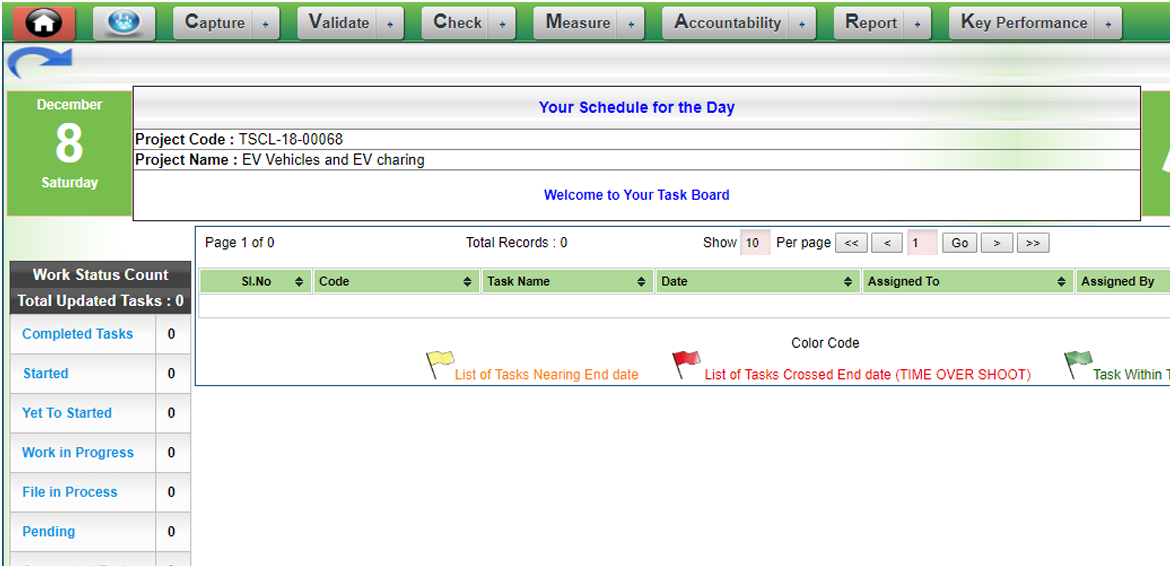
Milestone List
Validate->Milestone List
It provides the list of milestones set against the project. Only the projects which have the milestones will be listed out and based on the project name and work status, the records can be retrieved.
The information such as Status, Schedule Dates, File Uploads, Alert and the appropriate Flag will be displayed against each milestones of the project.

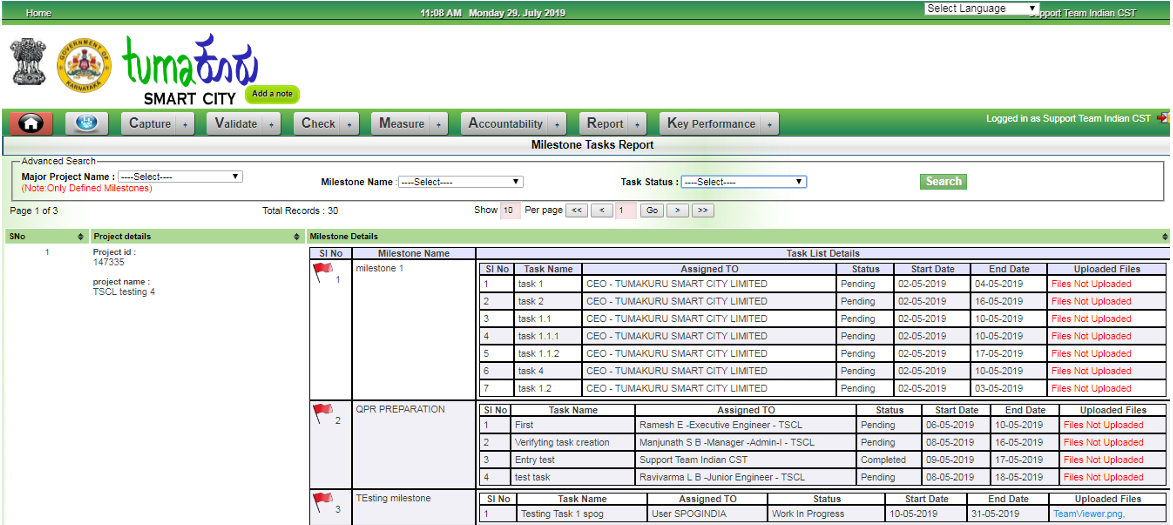
Task List
Validate->Task List
Task list gives the information such as Milestone name, Task name, Assigned to, Status, Start Date, End Date and File uploads.
Tasks against each milestone for a project will be listed out. The search parameters are Project wise, Milestone name wise and Task status wise
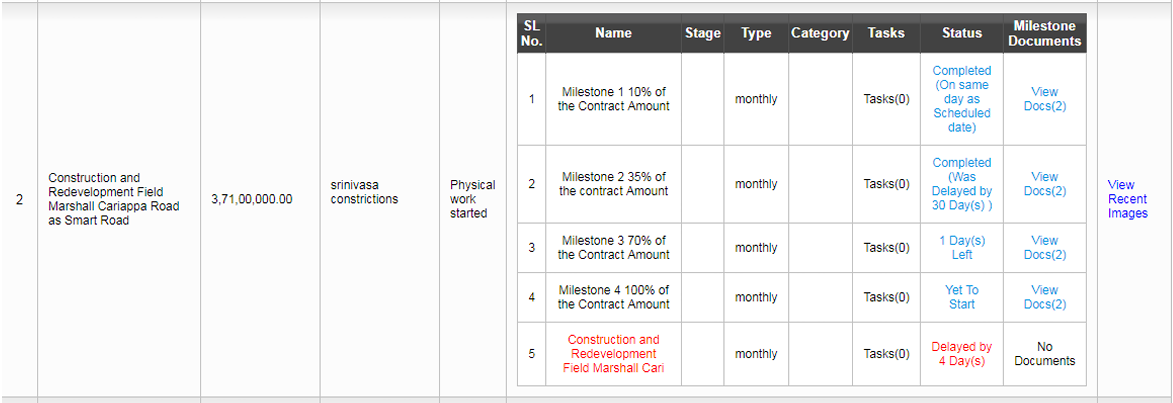
Milestone Report
Milestone list against each project is displayed with the details such as Stage, Type, Category, Tasks, Status and documents uploaded.
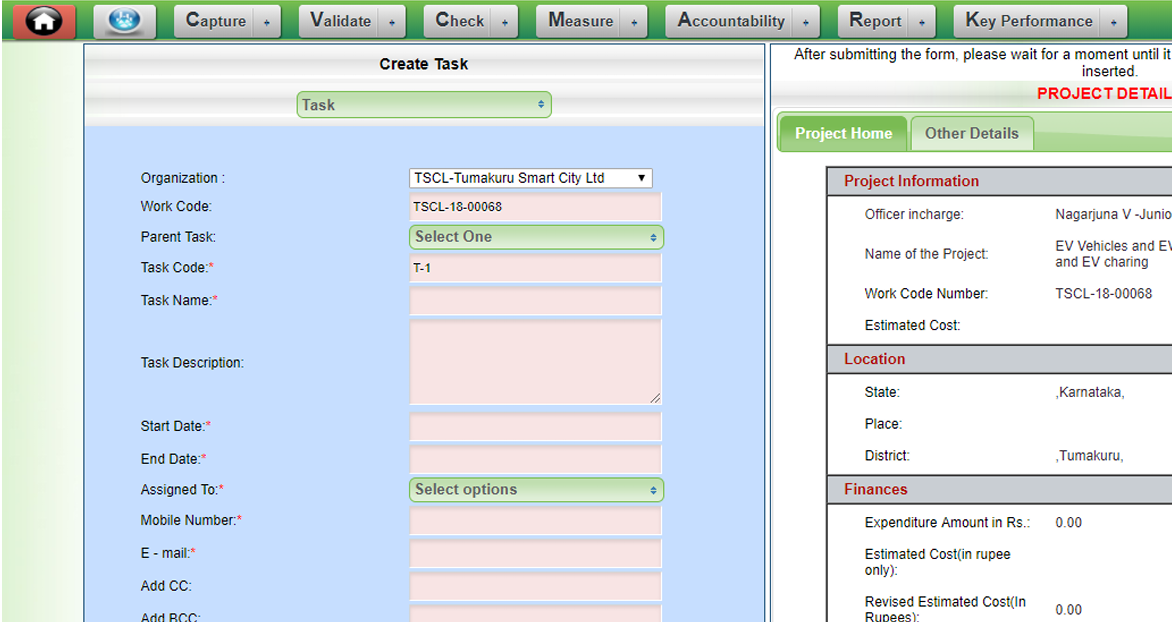
Assign Task: This module enables the user to assign the task among his/her team and monitor the status of the Task.
Click on New Task link to generate New Task Id. The user has to give the Description of the Task, Task Assigned to, the Start Date and End Date, Priority of the Task and the user can upload any document related to the task. After providing all the values, click on Submit button to generate Task Id.
The assigned to Users receive an email confirmation that the task has been assigned to him and once he completes the task he has to update the status to Completed by logging into his user credentials.
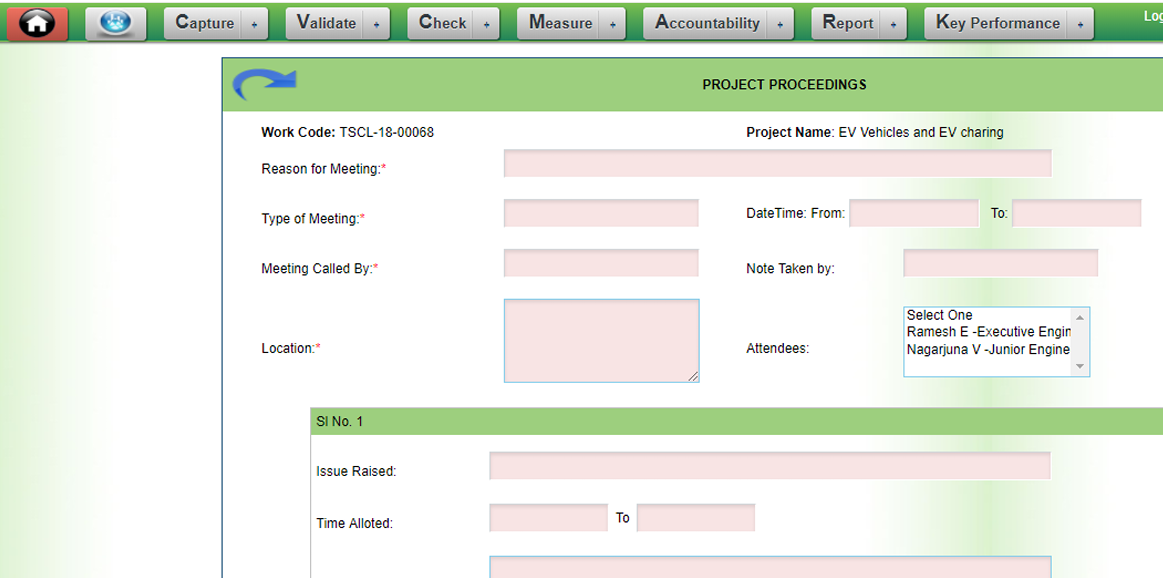
i. Minutes of Meeting: The User can send the Meeting schedule to the respective officer through E-mail.The user has to provide the values for Reason, Type of Meeting, Date and Time, Meeting Called By, Attendees, Issues Raised, Action to be Taken, By whom etc., and click on Send SMS or and send E-mail.
8.Key Performance->User Registration
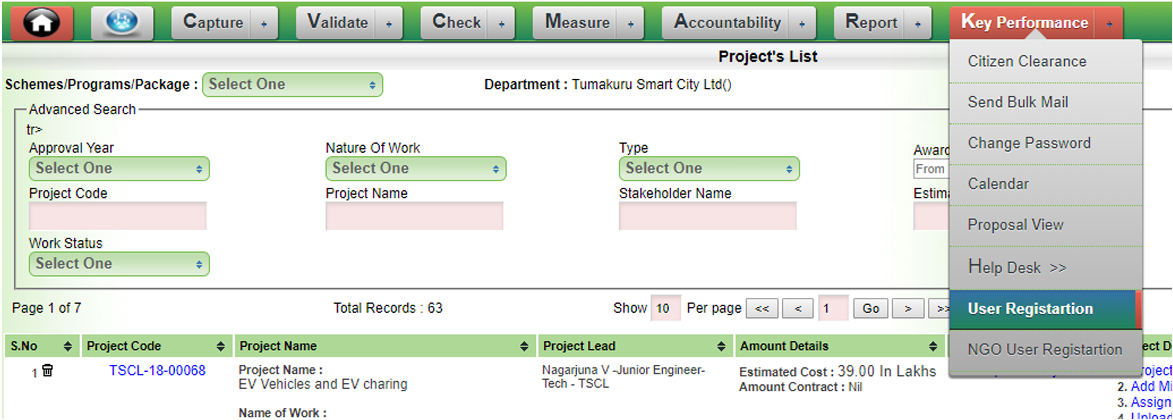
In this section users can register with their name and details
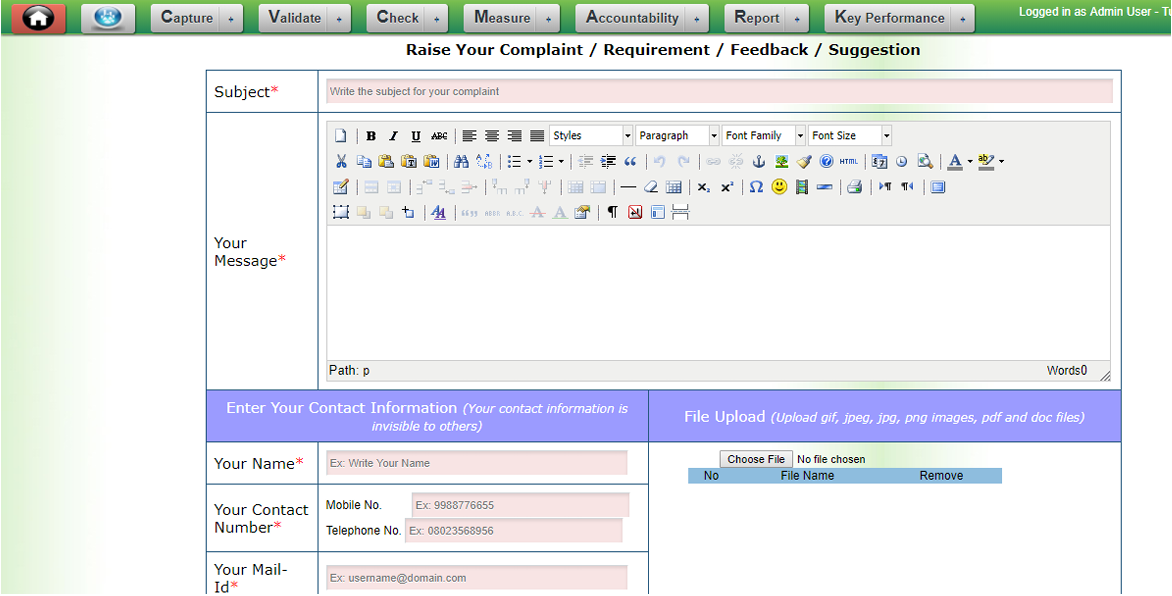
9.Help Desk: This menu helps an user to raise an issue/suggestion and view the status once it is attended by the appropriate officer.
Raise Complaint: Provide values for Subject field, Message, Upload the related files if any and click on Submit button. The Complaint gets forwarded to higher officer along with the user details who raised the complaint. The status can be maintained as per the progress of the complaint.

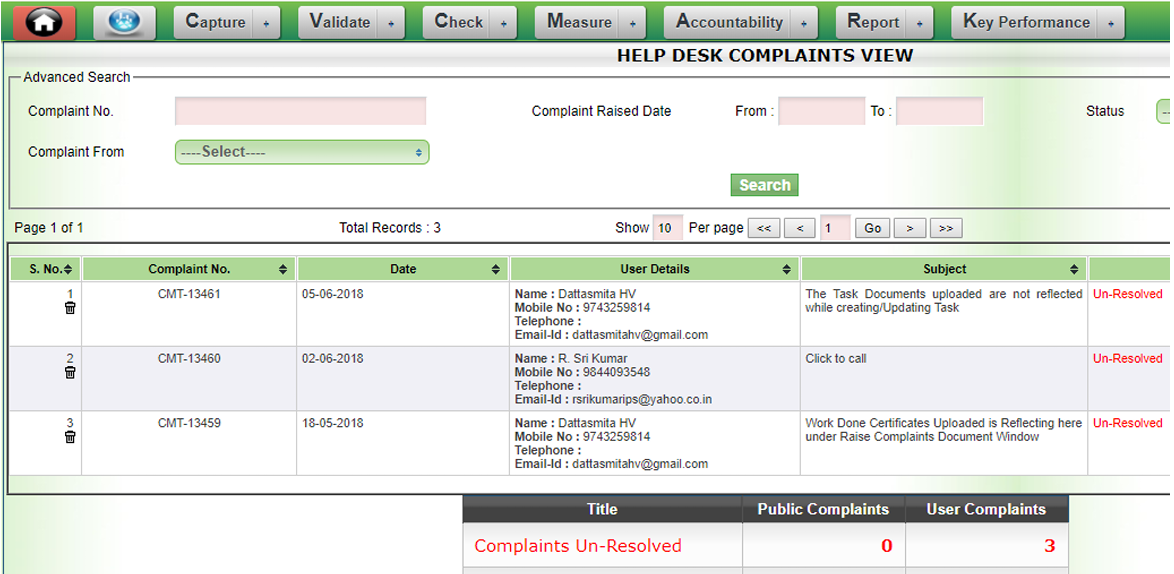
View Complaint: This menu helps user to track his raised complaint.
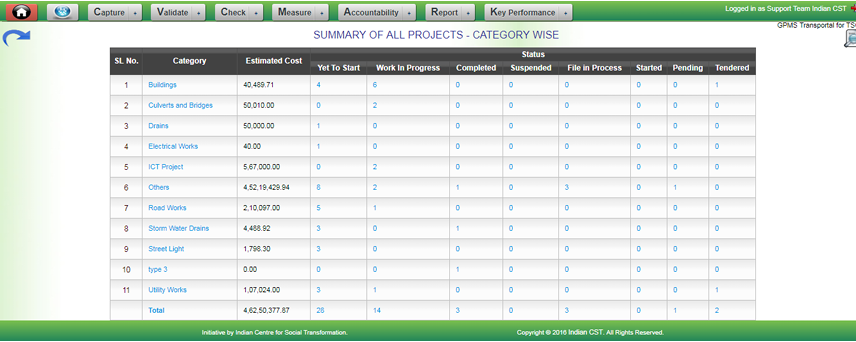
10. Reports
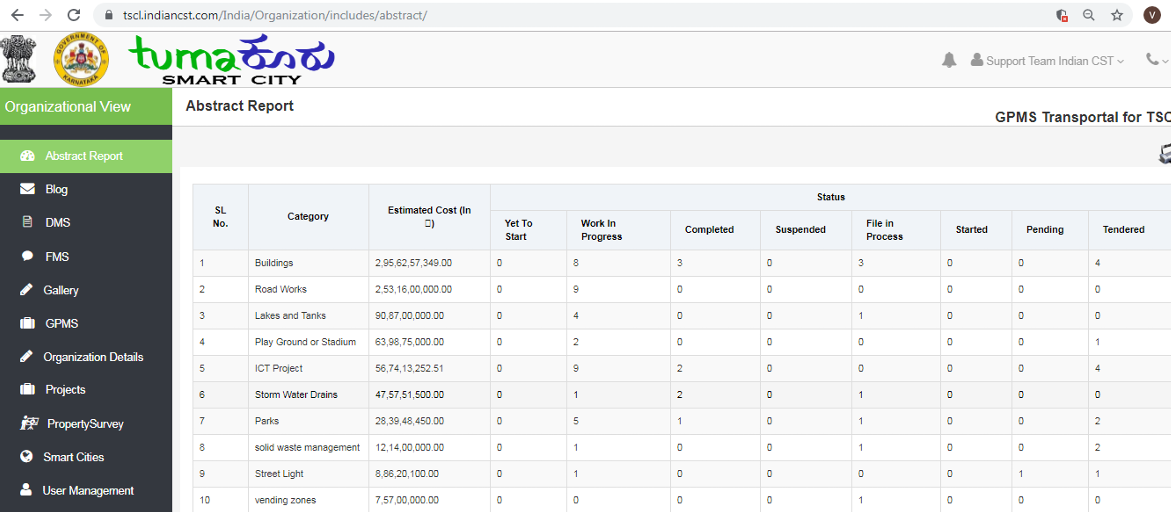
⬢ Abstract Reports
⬢ Project wise uploaded image reports

⬢ Work in Progress Reports
⬢ Tender Reports
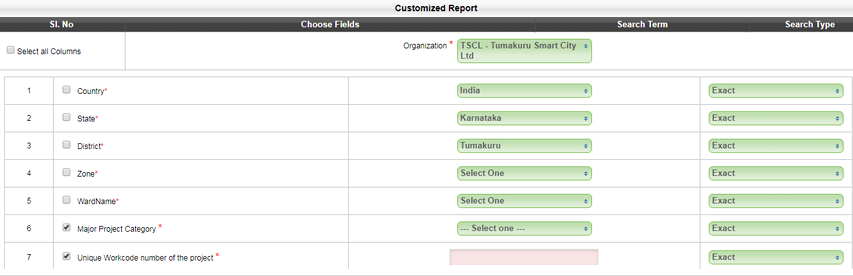
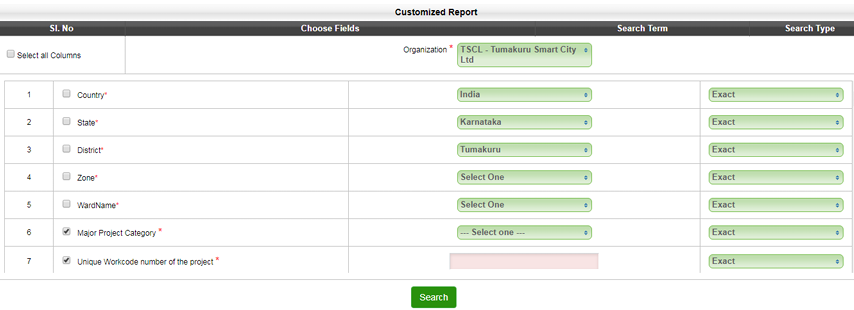
⬢ Customized Reports
i.Notesheet Menu: Notesheet is been enabled against each project for note correspondence. The note can be shared to an appropriate officer and the status can be monitored.

o. Payment Module: This module facilitates in maintaining the payment details such as Bill details, MB book, Deductions, and approval status by concerned officers against each project, online. 1. Once the project is created from the Generate Project Code Menu by adding Project Details, Project Location, Project Team, Project Category, Admin can approve the project. 2. Once the project is approved the Project Manager can add further project details like Billing Details, Financial Details, Project Location, Project Team, Approval Details, Tender Details. In Financial details, there will be Awarded Contract Sum, which is the awarded project amount approved for the whole project. Hence, the Payment amount should not be greater than the Awarded contract sum. The Awarded Contract Amount can be edited using the update project link which will be available in the Project List Menu. 3. After adding all the project details it will be available in the Project List and assigned to the concerned Project Team entered while entering the Project Details. 4. Once the Project appears on the Project list the user can enter the Payment Details
Flow:
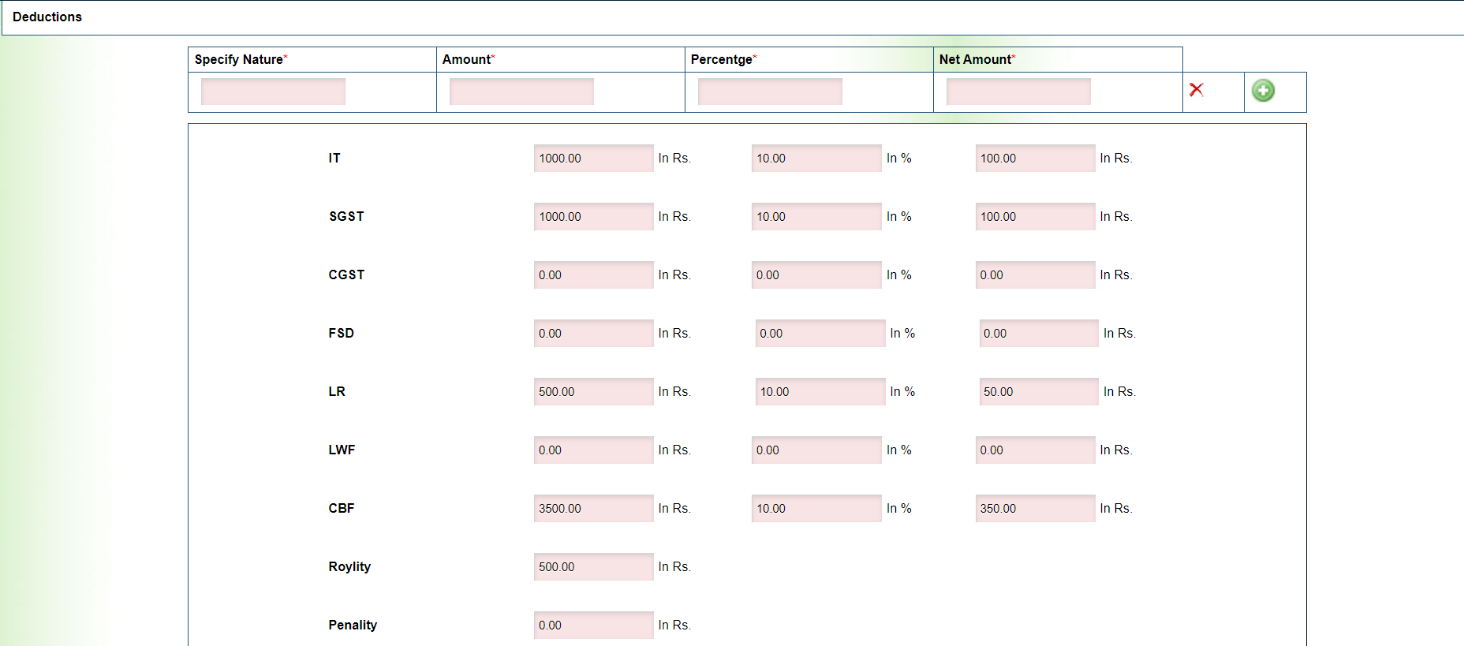
1. Contractor : The contractor will create a payment for a particular project. The contractor will upload the bill and then he will approve the payment. Once it is approved it will go to the caseworker. 2. Caseworker : Once the payment record appears for Caseworker he will be able to Approve to the next level user(ex.AE) or Send back to the Previous level user(ex. Contractor). If it is Approved by the Caseworker it will go to the AE otherwise it will remain in Pending status. The same process will be followed by the given users (AE, AEE, EE, CE) respectively where one step forward can approve and one step backward can send back by a particular user. 3. Caseworker : He will enter further Bill payment details where the Gross amount should be entered which can not be greater than the Present Bill Amount and Present Bill Amount cannot be greater than the Awarded Cost. The caseworker can enter the different types of Tax deduction like IT, GST, etc. which can be deducted from the Gross amount and then Net Payable Amount will be generated. The caseworker can also create and delete the different type of Tax deduction. 4. CFO : Once the payment record will be reached to the CFO he will be able to send back to any backword level user or can Approve the same to JMD. 5. JMD : JMD will follow the same rule as CFO and the payment record can forward to MD. 6. MD : MD also will follow the same rule as JMD and CFO but once MD will Approve the Payment the payment record will never go back to any previous level user for any kind of edit in the payment record. It will directly go to the CFO and CFO will make a request for the Cheque to Caseworker. 7. CFO : CFO can make a request to the Caseworker to prepare cheque until then it will be in Pending status.Bill Flow:

Validations:
1. Users can access Payment module by clicking on Validate->Financial Management->Payment menu 2. Contractor can raise any number of Bills against the Awarded cost of the Project. Total Bills amount should be less than or equal to Awarded cost. 3. Whenever the Status – Approved is selected and Submit the record, the record will be available to the next level user. 4. Whenever the Status – Send Back is selected and Submit the record, the record will be available to the previous level user 5. Only CFO, JMD and MD can send back the record to any user level by selecting the level of the user in the Send Back To list box. 6. Whenever the record is Sent Back by any of the level user, the further flow of the payment will be blocked. 7. Payment History is available to all the users. 8. Once MD Approves the payment, the record will be available to CFO. When CFO submits the record, the record is available to Case worker to prepare the cheque. Case worker prepared the cheque and Approve the record. The approved record will be available to CFO for verification.
CFO then submits the record and the record will be available to MD for final verification. MD after verifying selects PAY ORDERstatus and submit the button. Thus, completes the Payment flow for a particular Bill. Bill Details are available in the Validate->Project List - Project Dashboard against a particular project 10. Month wise Payments and Month wise Deduction Reports are available only to CFO login. Printing the same is enabled. 11. Bill Details will be available in the Home page of Project Details link
User Level Flow
1. ICT Manger: a) creates a project by adding Caseworker, AE, AEE EE, CE, CFO, JMD and MD in the Project Team tab. Awarded cost must be entered b) The existing users/engineers should be mapped to their designation group in Key Participants->User Registration – Edit each user page and map to their respective designation in the Group To list box c) register Contractor’s(stakeholder’s) Organization in TSCL GPMS Transportal d) register Contractor for the stakeholder organization by mapping to Stakeholder user to the Stakeholder user group in Key Participants->User Registration->Group TO list box e) adds Contractor to the project by adding him in project team tab 2. Contactor: a) logs in with the assigned user id and password provided by the TSCL ICT Manager b)clicks on the Payment Link and clicks on Add Payment c) enters basic Bill details and clicks on SUBMIT button d) clicks on Payment Link and clicks on Upload Bill and upload the needed Bill e) selects Approved from the Status list box f) enters Remarks g) clicks on SUBMIT button 3. Case Worker: a) clicks on Payment link b) clicks on Add Payment link c) enters the necessary deductions d) selects Approved from the Status list box e) enters Remarks f) clicks on SUBMIT button 4. Assistant Engineer: a) clicks on Payment link b) clicks on Add Payment c) selects Approved from the Status list box d) enters Remarks e) clicks on SUBMIT button 5. Assistant Executive Engineer: a) clicks on Payment link b) clicks on Add Payment c) selects Approved from the Status list box d) enters Remarks e) clicks on SUBMIT button 6. Executive Engineer: a) clicks on Payment link b) clicks on Add Payment c) selects Approved from the Status list box d) enters Remarks e) clicks on SUBMIT button 7. Chief Engineer: a) clicks on Payment link b) clicks on Add Payment c) selects Approved from the Status list box c) selects Approved from the Status list box c) selects Approved from the Status list box d) enters Remarks e) clicks on SUBMIT button 8. Chief Accounts Officer: a) clicks on Payment link b) clicks on Add Payment c) selects Approved from the Status list box d) enters Remarks d) enters Remarks e) clicks on SUBMIT button 9. Joint Managing Director a) clicks on Payment link b) clicks on Add Payment c) selects Approved from the Status list box d) enters Remarks e) clicks on SUBMIT button 10. Managing Directora) clicks on Payment link a) clicks on Payment link b) clicks on Add Payment c) selects Approved from the Status list box d) enters Remarks e) clicks on SUBMIT button 11. Chief Accounts Officer a) clicks on Payment link b) clicks on Add Payment c) selects Approved from the Status list box (gives approval for case worker to prepare the cheque) d) enters Remarks e) clicks on SUBMIT button 12. Case worker: a) clicks on Payment link b) clicks on Add Payment c) enters cheque details by providing necessary cheque details d) selects Approved from the Status list box (cheque prepared) e) enters Remarks f) clicks on SUBMIT button 13. Chief Accounts Officer a) clicks on Payment link b) clicks on Add Payment c) selects Approved from the Status list box d) enters Remarks e) clicks on SUBMIT button 14. Managing Director f) clicks on Payment link g) clicks on Add Payment h) selects Pay Order from the Status list box i) enters Remarks j) clicks on SUBMIT button Example: Server: Staging ServerProject Name: Smart Sports Complex
Created By CEO
Stakeholder/Contractor: PMC User (PMCTEST – Organization Name)
Pre-requisite Project is created, and Stakeholder is mapped to the project.
1. Contractor - The Contractor Logs in with the organization code and user id information provided to him by ICT Manager.
● The particular project will be available in Project Dashboard
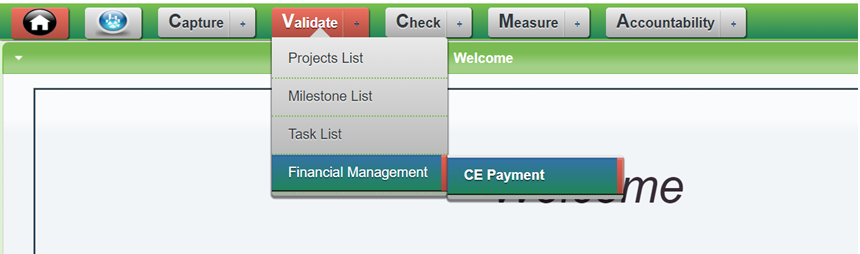
● Under Payment --> Clicks on Payment link
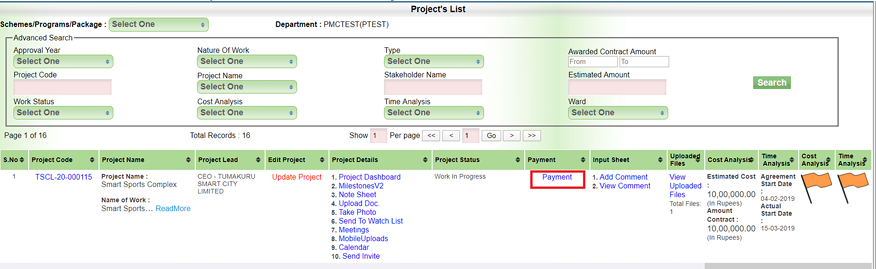
● Clicks on Add Payment link.
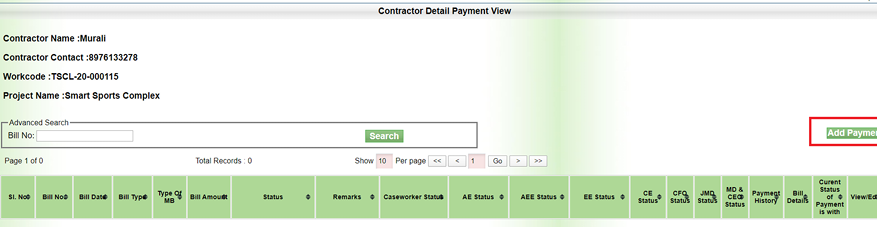
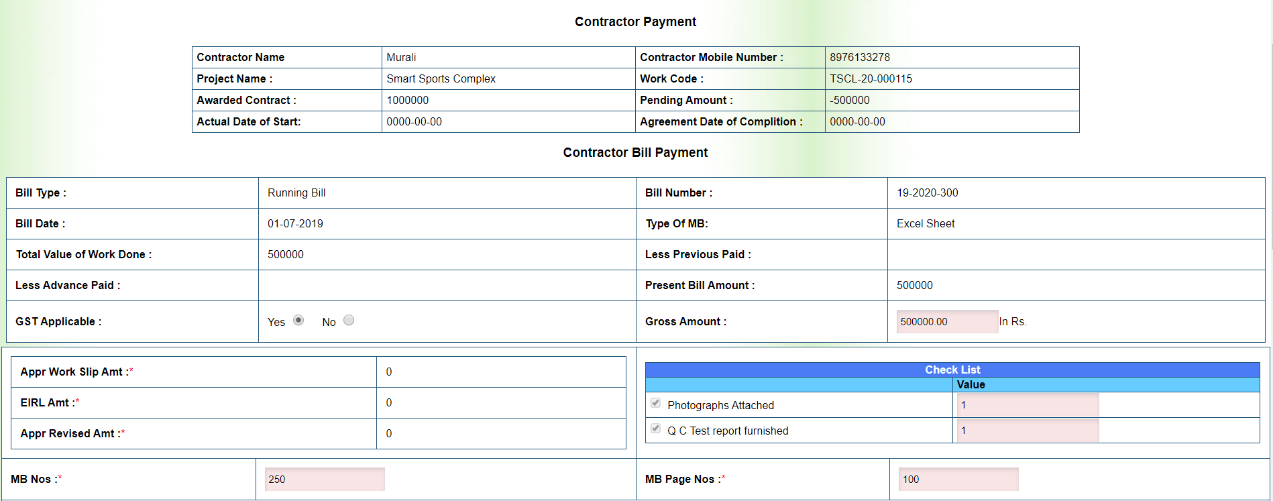
● Enters Bill Details – All the details like Bill No, Bill amount, Bill date etc., and clicks on SUBMIT
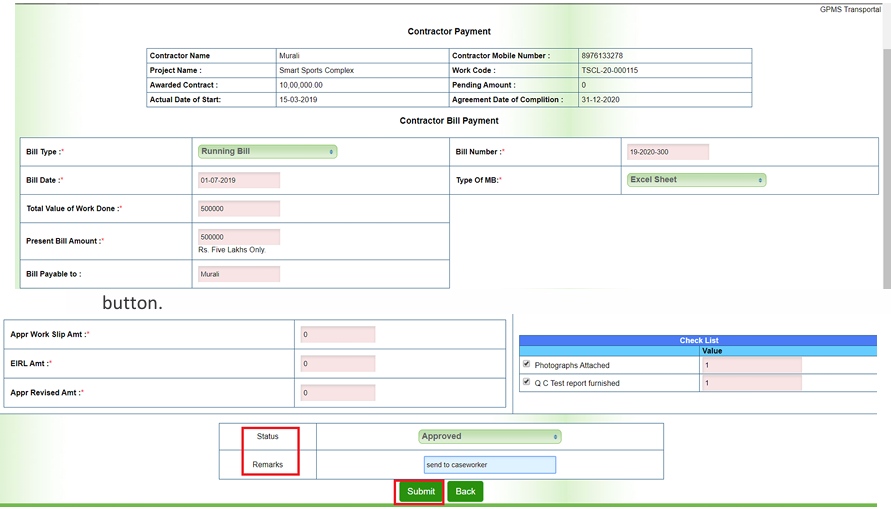
● Click on Upload Bill against that record and click on submit button.

● After submitting, view bill details option appears.
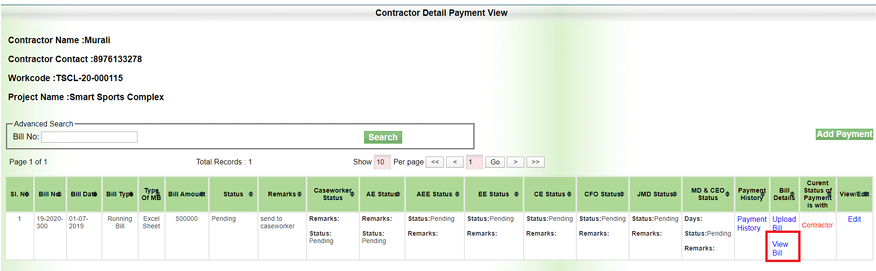
2. Caseworker - Once the payment record appears for Caseworker, he will be able to approve to the next level user (ex.AE) or Send back to the Previous level user (ex. Contractor). If it is approved by the Caseworker it will go to the AE otherwise it will remain in Pending status. The same process will be followed by the given users (AE,AEE, EE, CE) respectively where one step forward can approve and one step backward can send back by a particular user.
● The Caseworker Logs in with the organization code and user id information provided to him by ICT Manager
● The project will be available in Project Dashboard
● Click on Validate option --->select Financial Management -->select caseworker.

● Under Action --> click on Payment option.

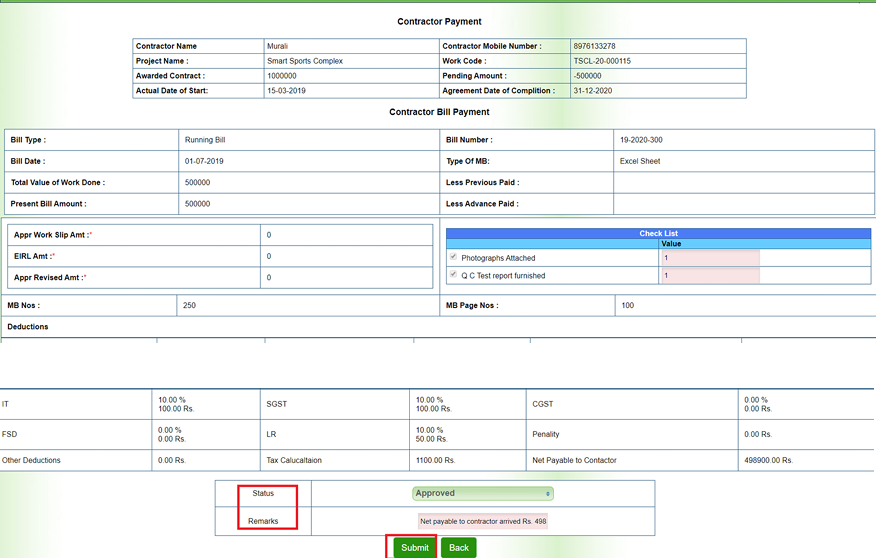
● Enters Bill Details – GST Applicable, MB Nos, Amount, Parentage, IT, SGST etc.….
● Select Approved from status list box.
● Enter Remarks.
● Click on Submit Button.


3. Assistant Engineer (AE) - After approval from caseworker it will come to AE level .
● The AE Logs in with the organization code and user id information provided to him by ICT Manager
● The project will be available in Project Dashboard
● Click on Validate option --->select Financial Management -->select AE Payment
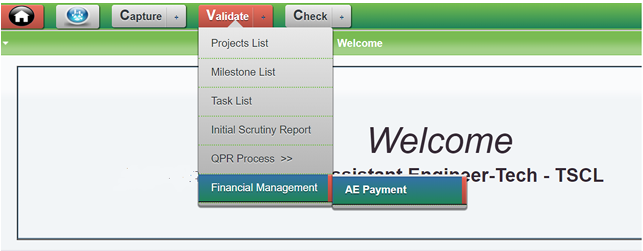
● Under Action --> Click on Payment option.

● Check all the fields, if correct select status as approved otherwise pending.
● Enter Remarks.
● Click on Submit Button
4. Assistant Executive Engineer (AEE) - After approval from AE it will come to AEE level.
● The AEE Logs in with the organization code and user id information provided to him by ICT Manager
● The project will be available in Project Dashboard
● Click on Validate option --->Select Financial Management -->select AEE payment.
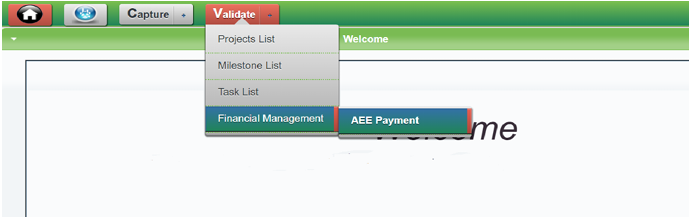
● Under the Action --> click on Payment option.

Check all the fields its correct or not.
● Select Approved from the status list box
● Enter Remarks
● Click on Submit Button.
5. Executive Engineer (EE)- After approval from AEE it will come to EE level.
● The EE Logs in with the organization code and user id information provided to him by ICT Manager
● The Project will be available in Project Dashboard.
● Click on Validate option --> Select Financial Management --> Select EE Payment.
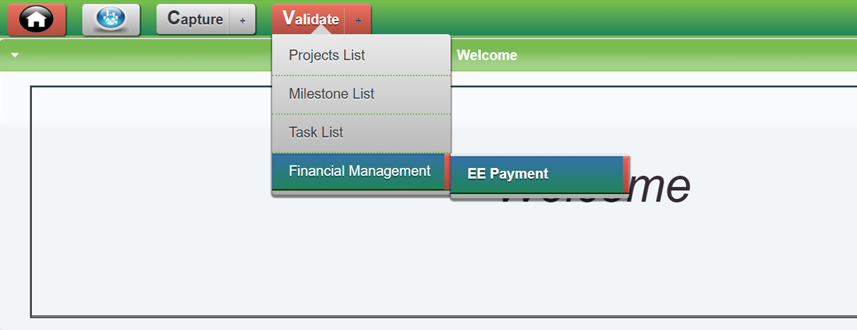
● Under the Action --> click on Payment option.
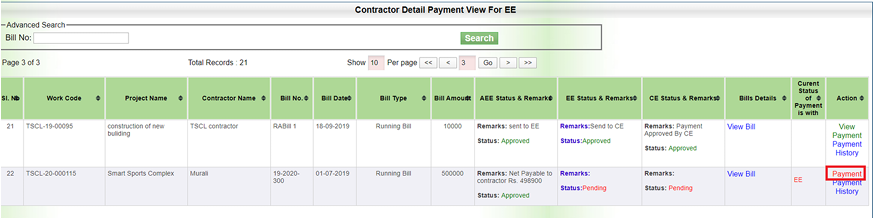
● Check all the fields its correct or not..
● Select Approved from the status list box
● Enter Remarks
● Click on Submit Button.
6. Chief Engineer (CE)- After approval from EE it will come to CE level.
● The CE Logs in with the organization code and user id information provided to him by ICT Manager
● The project will be available in Project Dashboard
● Click on Validate option --->select Financial Management -->select CE payment.
● Under the Action --> click on Payment option.
● Check all the fields its correct or not.
● Select Approved from the status list box
● Enter Remarks.
● Click on Submit Button.
7. Chief Finance Officer (CFO) - Once the payment record will be reached to the CFO he will be able to send back to any backward level user or can Approve the same to JMD.
● The CFO Logs in with the organization code and user id information provided to him by ICT Manager
● The project will be available in Project Dashboard
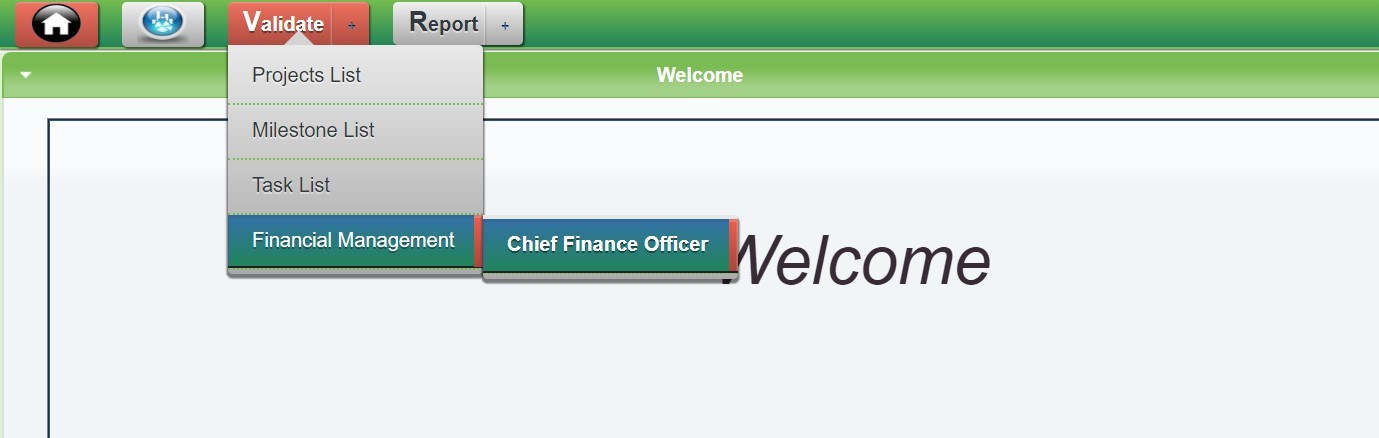
● Click on Validate option --->select Financial Management -->select Chief Financial Officer

● Under Action--> click on Payment link.
Check all the fields its correct or not
● Select Approved from the status list box.
● Enter Remarks
● Click on Submit Button.
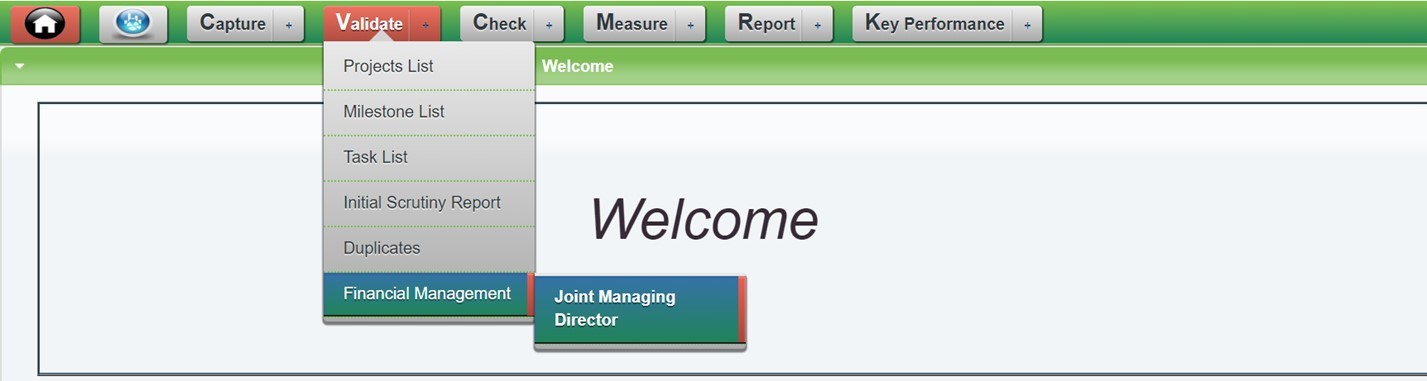
8. Joint Managing Director (JMD) - JMD will follow the same rule as CFO and the payment record can forward to MD.
● The JMD Logs in with the organization code and user id information provided to him by ICT Manager
● The project will be available in Project Dashboard
● Click on Validate option --->select Financial Management -->select Joint Managing Director.
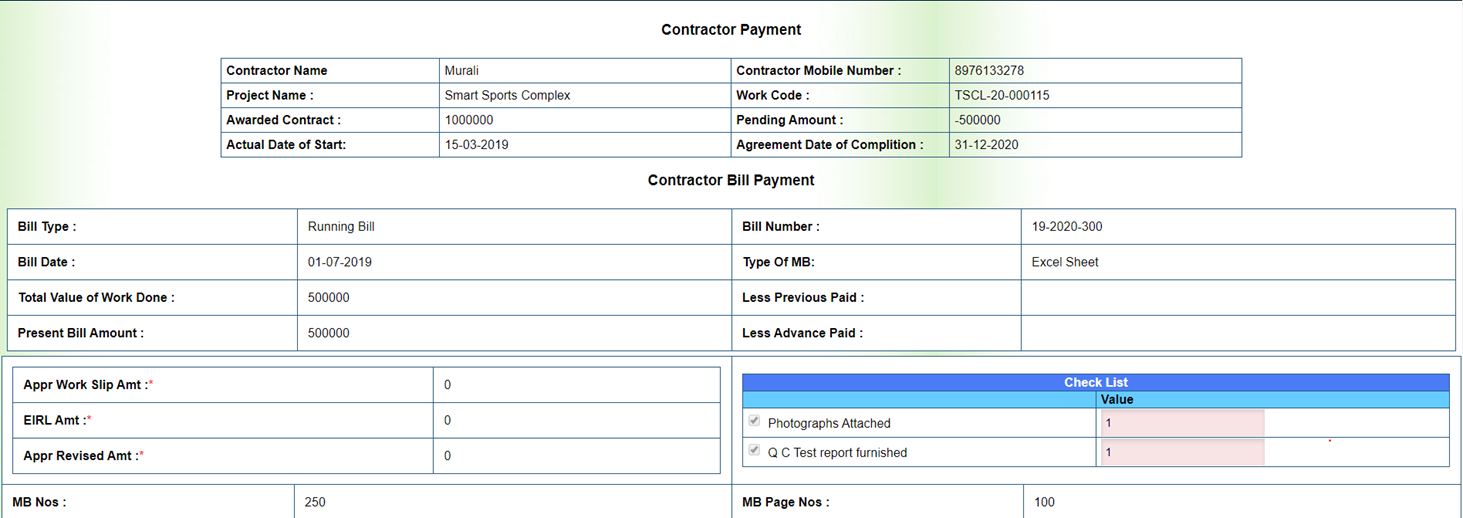
● Under Action --> Click on Payment option.
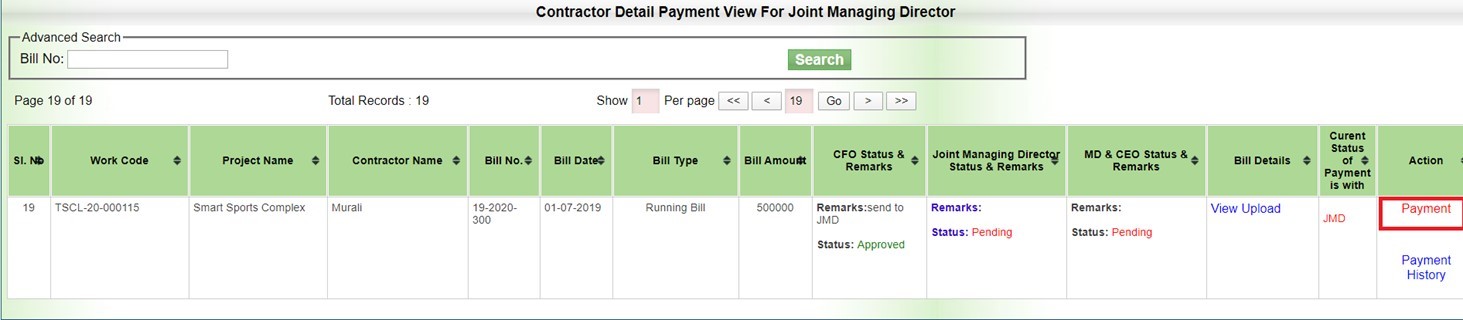
● Check all the fields its correct or not.
● Select Approved from the status list box • Enter Remarks.
● Click on Submit button.

9. Managing Director (MD) - MD also will follow the same rule as JMD and CFO but once MD will Approve the Payment the payment record will never go back to any previous level user for any kind of edit in the payment record. It will directly go to the CFO and CFO will make a request for the Cheque to Caseworker.
● The MD Logs in with the organization code and user id information provided to him by ICT Manager
● The project will be available in Project Dashboard
● Click on Validate option --->select Financial Management -->select Managing Director and Chief Executive Officer Payment.
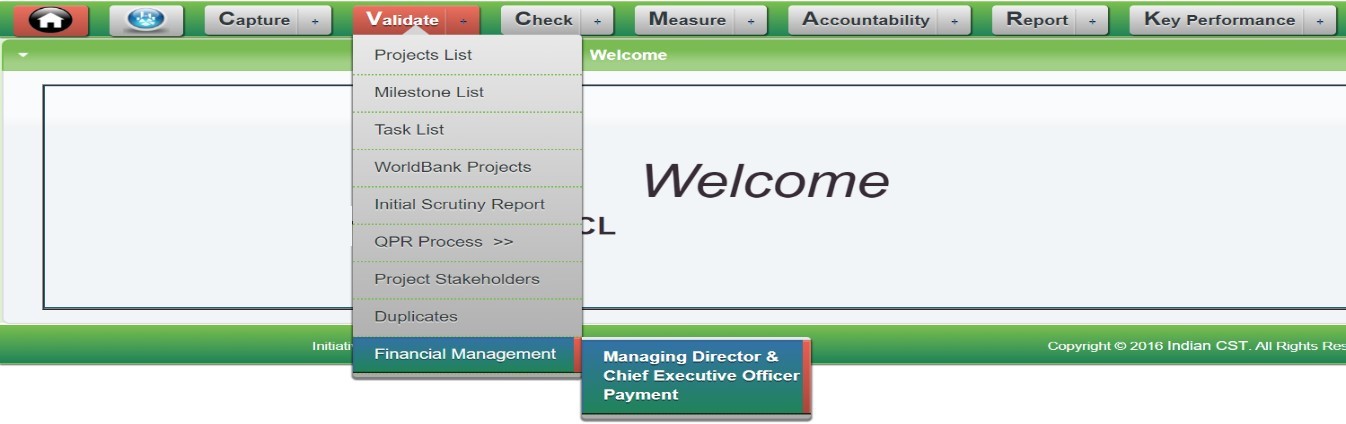
● Under Action --> Click on Payment link
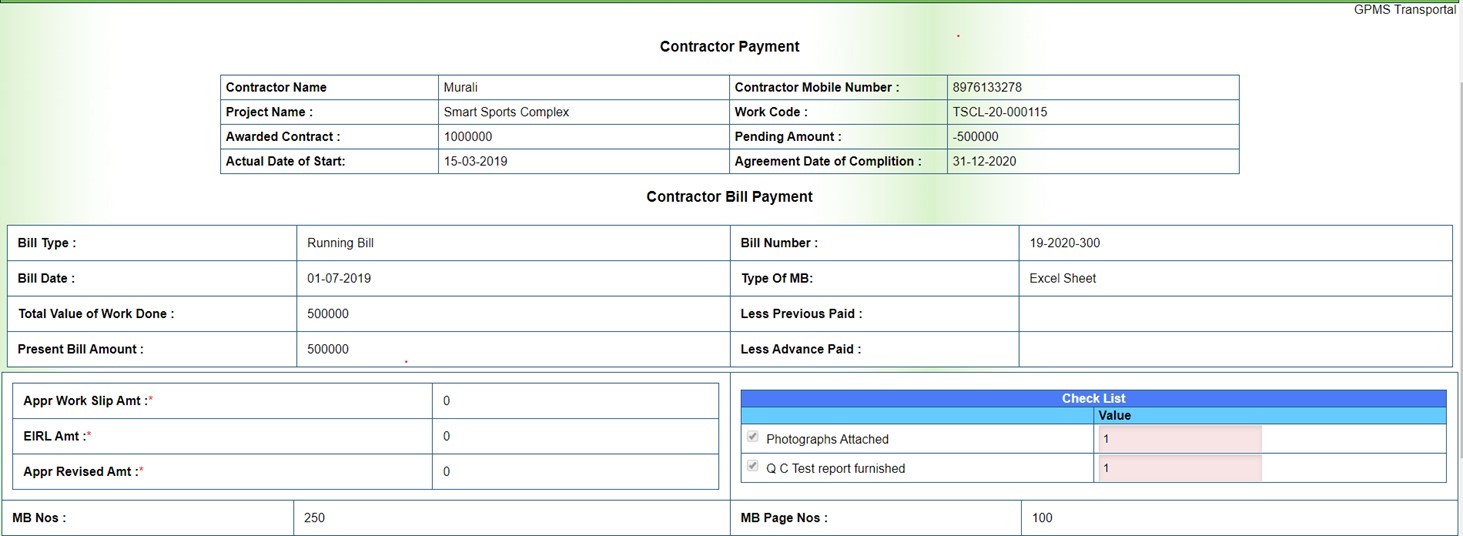
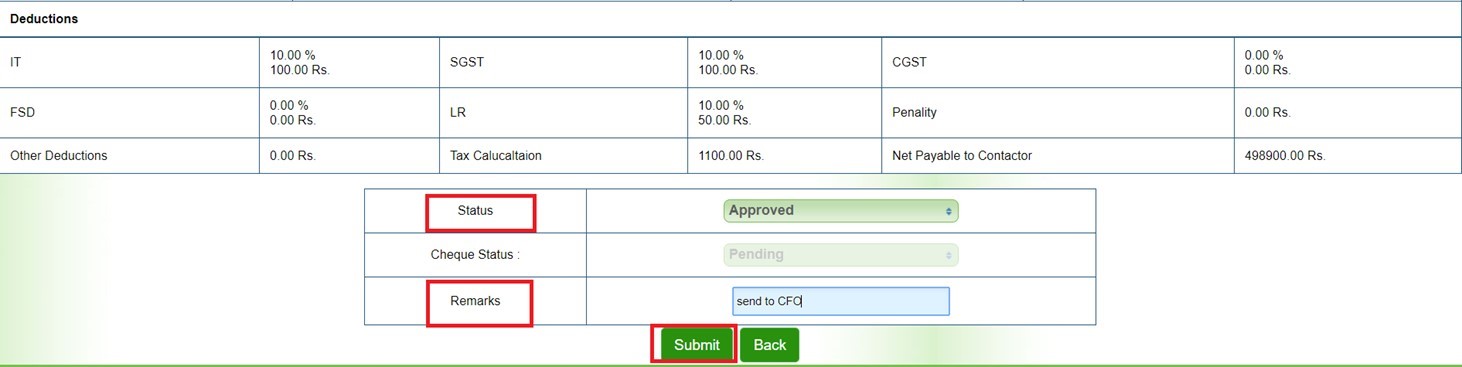
● Check all the fields its correct or not.
● Select Approved from the status list box.
● Enter Remarks.
Click on Submit button.
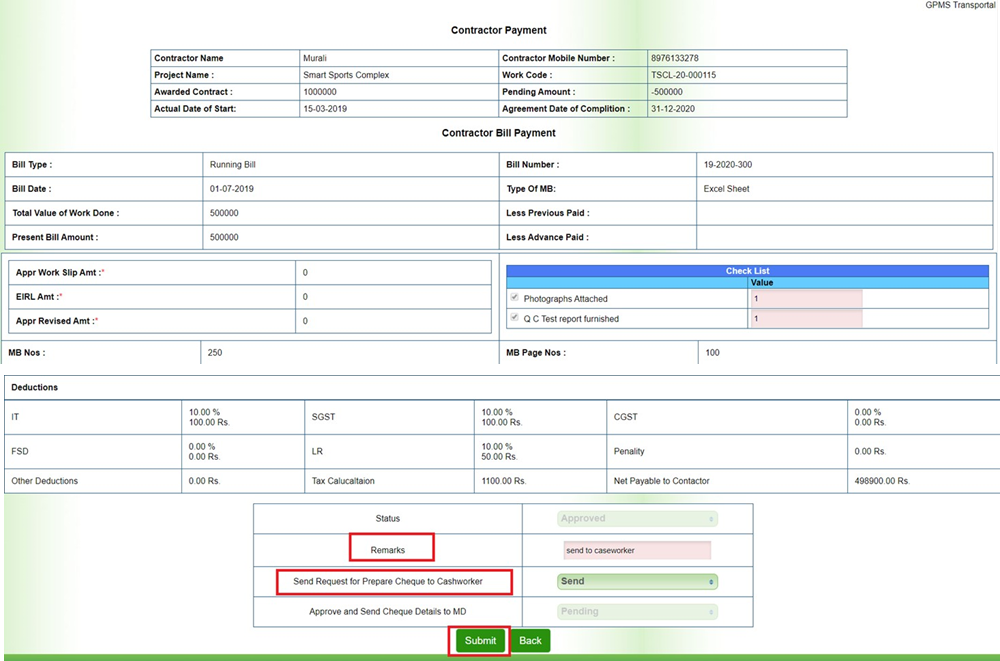
10. Chief Finance Officer (CFO) After approval from MD it will redirect to CFO, which can make a request to the Caseworker to prepare cheque until then it will be in Pending status.
● Enter Remarks.
● The CFO Logs in with the organization code and user id information provided to him by ICT Manager.
● The project will be available in Project Dashboard.
Click on Validate option -->select Financial Management -->select Chief Finance Officer.
● Under Action --> Click on Payment option.

● Selects Send from the Send request for prepare cheque to caseworker list box (gives approval for case worker to prepare the cheque)
● Enters Remarks
Click on Submit button.
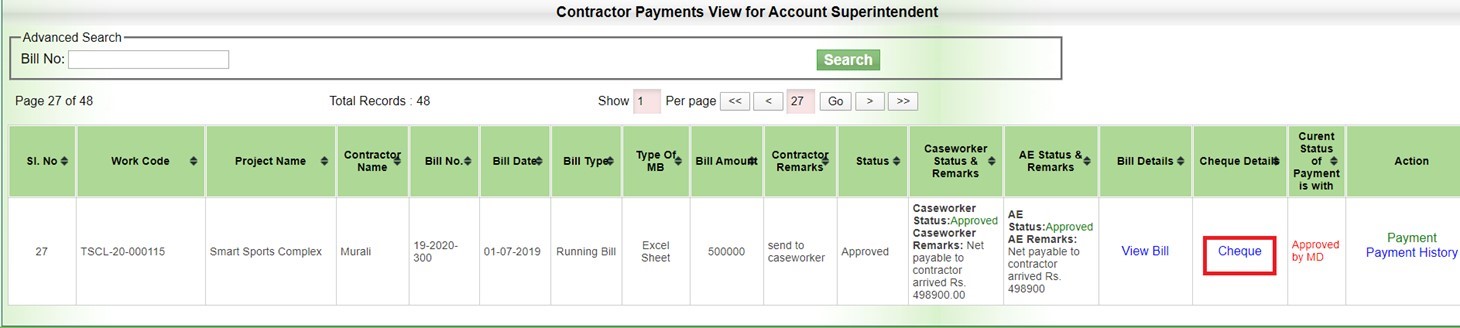
11. Caseworker - Once the Caseworker will get the request to prepare a cheque for the particular payment record, the cheque detail link will be enabled for Caseworker and he can fill the details. Once the cheque details are filled, he can send back the cheque to CFO by changing the cheque status on the payment page.
● The Caseworker Logs in with the organization code and user id information provided to him by ICT Manager
● The project will be available in Project Dashboard
● Click on Validate option --->select Financial Management -->select caseworker.

● Under Cheque Details --> Click on cheque option --> Fill all the details and click on add symbol then click on Submit button.
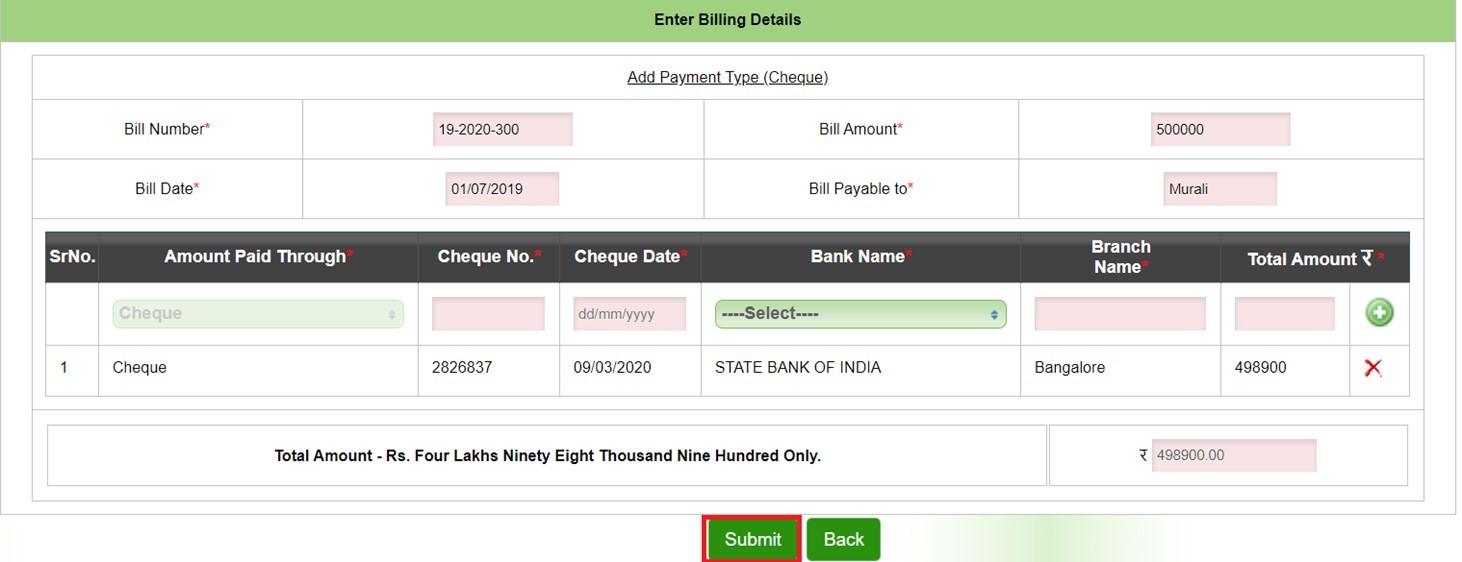
● Under Action --> click on Payment option.
● Selects Prepared from the Cheque Status list box (cheque prepared)
● Enters Remarks
● Click on Submit button .
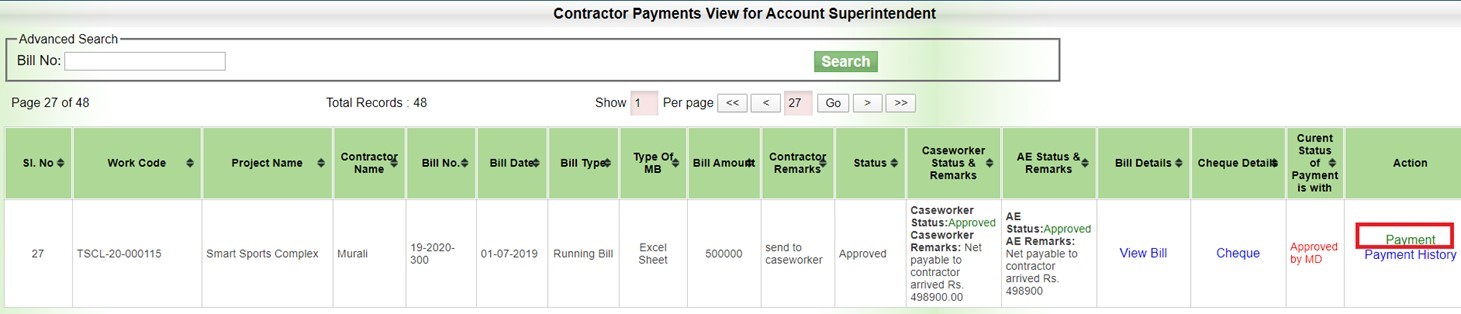
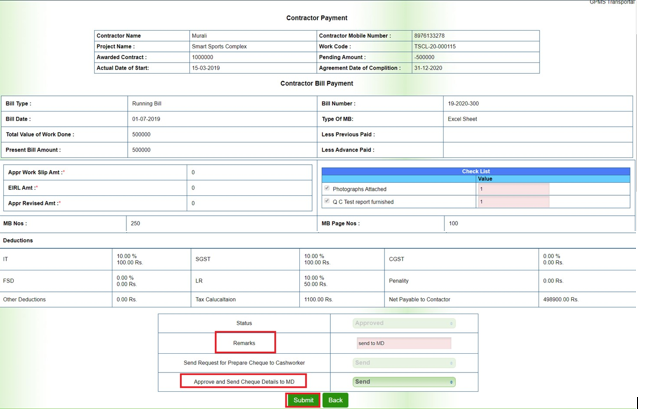
12.Chief Finance Officer(CFO) - Now CFO can check the cheque details and can approve and send the cheque details to the MD or, can reject the cheque to the Caseworker.
● The CFO Logs in with the organization code and user id information provided to him by ICT Manager
● The project will be available in Project Dashboard.
● Click on Validate option -->select Financial Management-->select Chief Finance Officer.
● Under Action --> Click on Payment Option.

● Selects Send option from the Approve and Send Cheque Details to MD list box • Enters Remarks.
● Click on Submit button.
13.Managing Director (MD) - MD can check the cheque details and can do Pay Order or send back the cheque details to the caseworker for the correction.If the payment is Pay Ordered means the record is closed.
● The MD Logs in with the organization code and user id information provided to him by ICT Manager
● The project will be available in Project Dashboard.
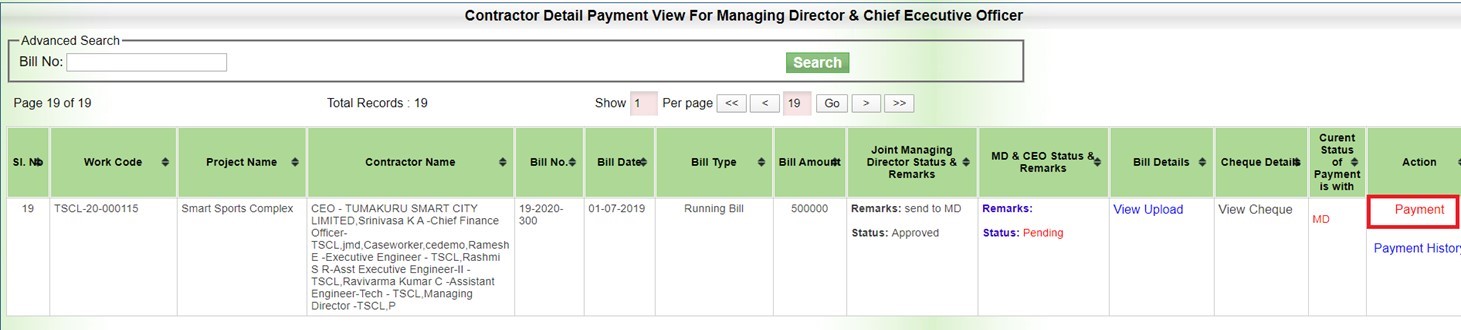
● Click on Validate option -->select Financial Management -->select Managing Director & Chief Executive Officer Payment.
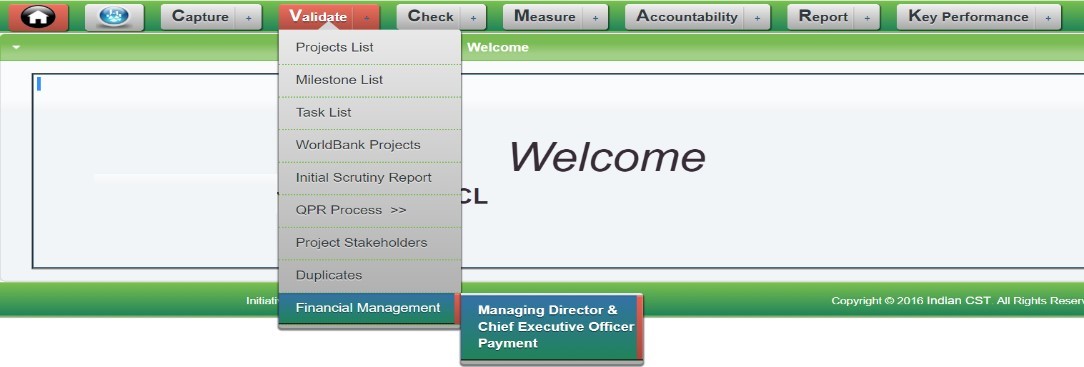
● Under Action --> Click on Payment link.
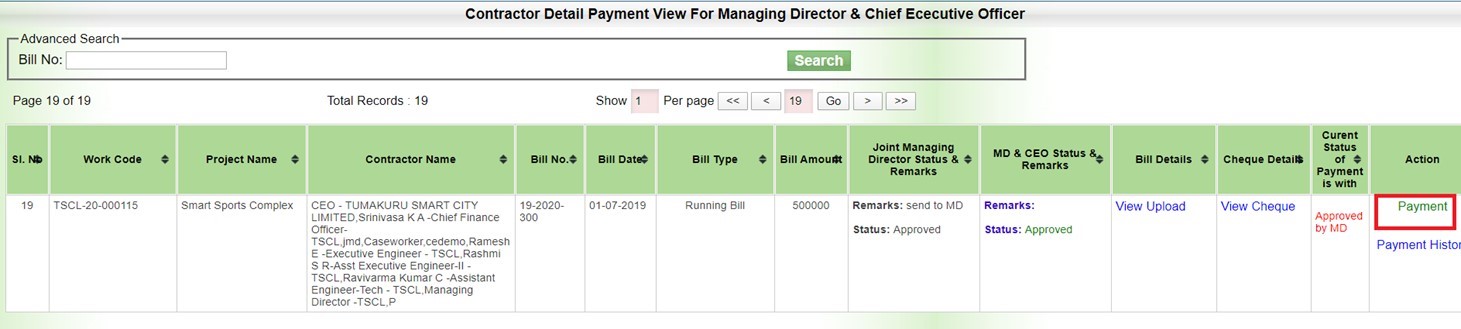
● Selects Pay Order from the Cheque Status list box
● Enters Remarks
● Clicks on SUBMIT button

14. Project Dashboard - Login with organization code and username and Password-->Click on
Validate -->click on Project list --> Search your project name --> click on Project Dashboard

against your project.
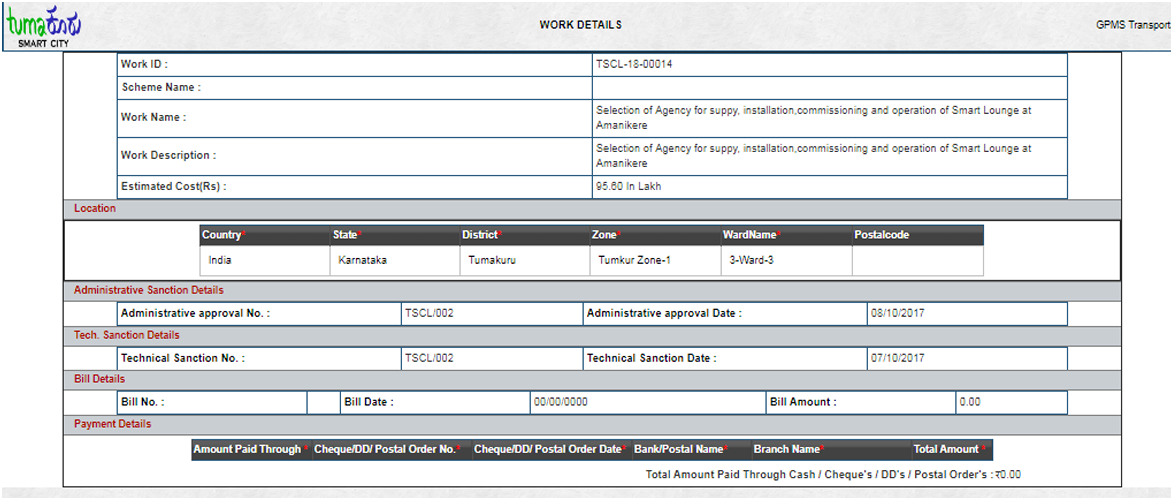
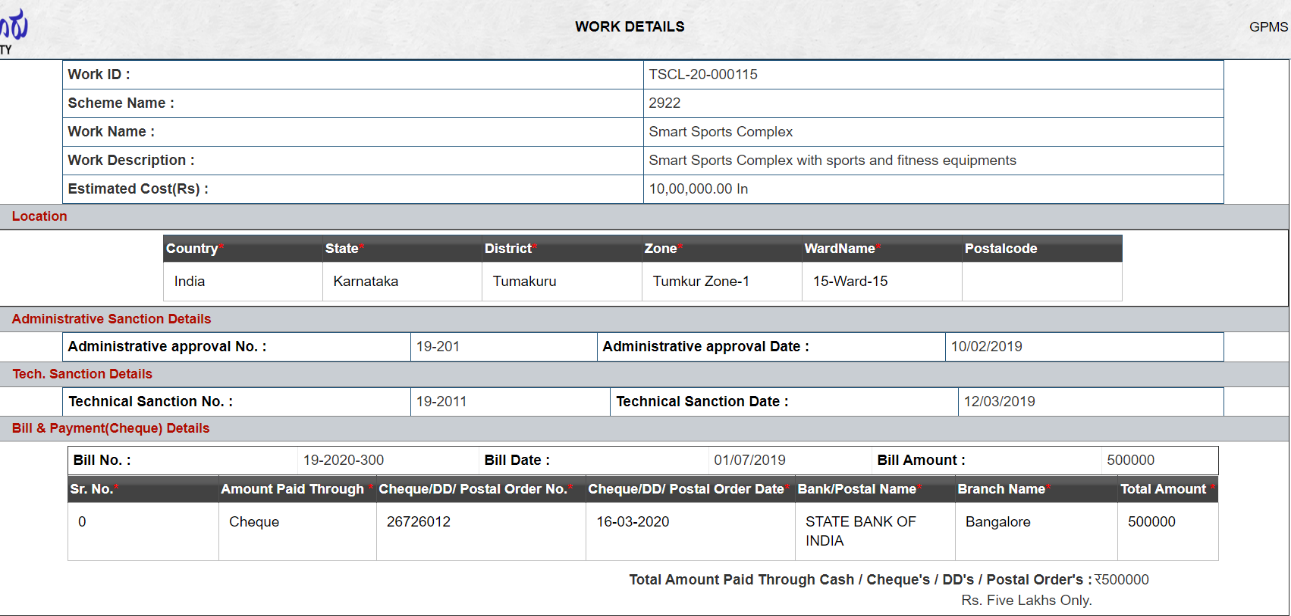
● Bill Details are available in the Project Dashboard
● Click on Billing Details --> we get all details like bill number, Bill date etc...
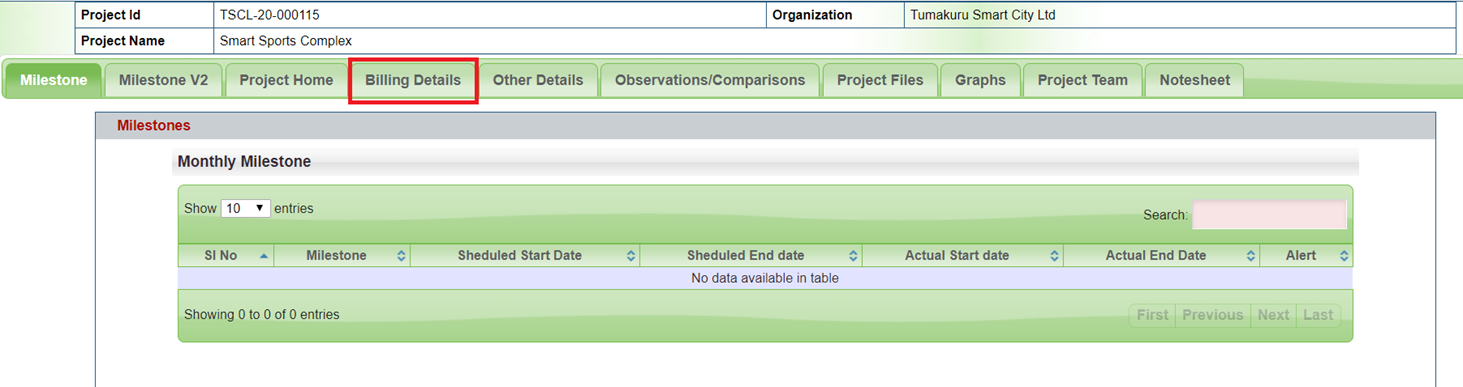
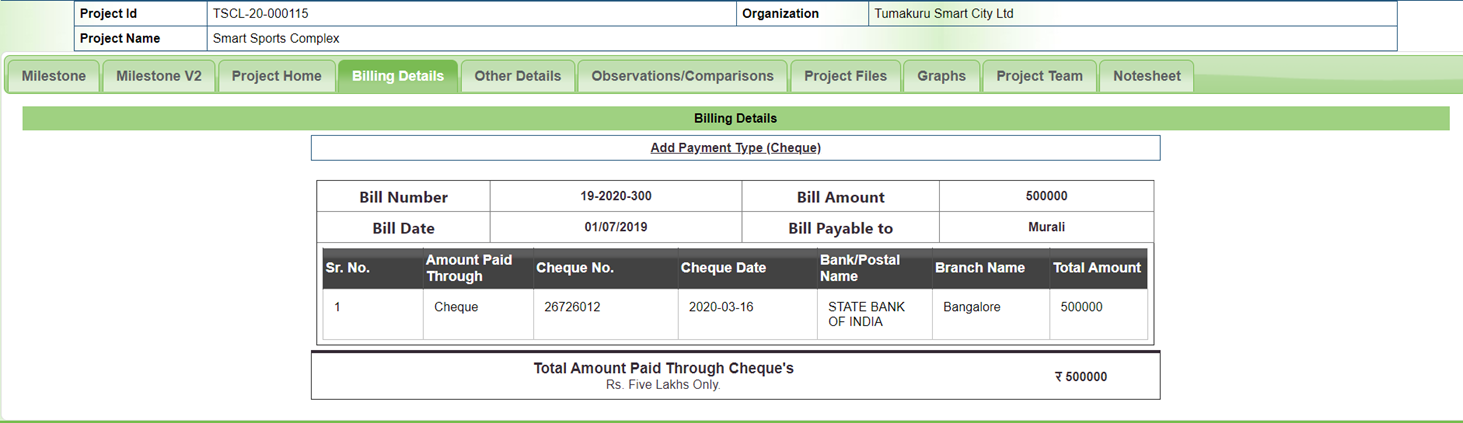
● Bill Details will be available in the Home page of Project Details link.
●Open the site-->click on Menu Icon-->click on Project option-->Project list open
● Search your Project name --> Click on View Details -->Bill Details is Visible.

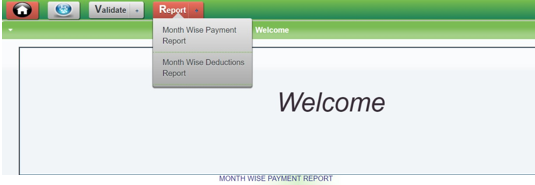
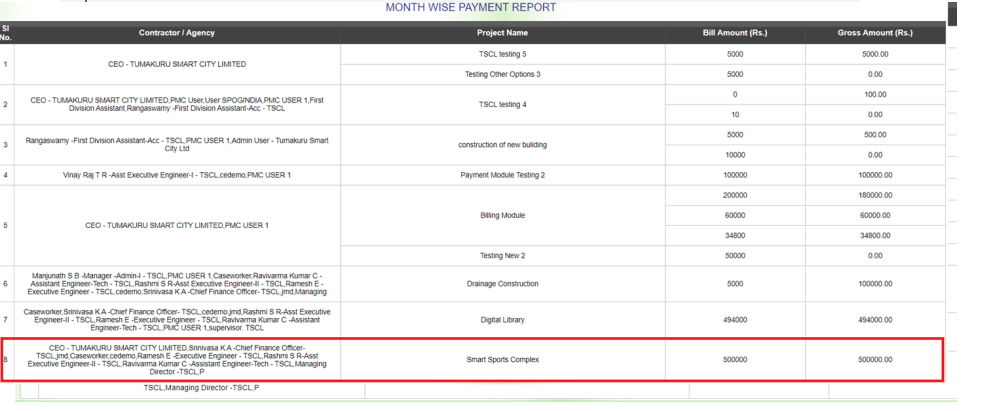
15. Chief Finance Officer (CFO) The CFO Logs in with the organization code and user id information provided to him by ICT Manager
The project will be available in Project Dashboard
Click on Reports --> select Month wise Payment report and Month wise Deduction Report

2. Document Management System
A document management system is a system used to track, manage and store documents and reduce paper. DMS in GPMS Transportal is capable of keeping a record of the various versions created and modified by different users
File uploading against the Organization for processing:
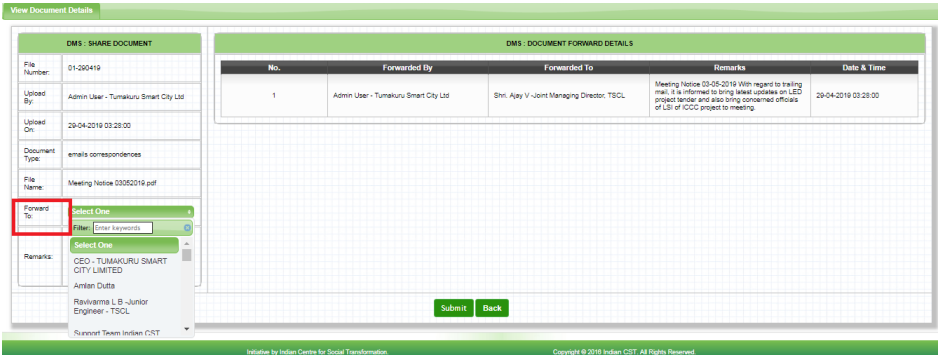
File can be shared/forwarded to selected users in the organization for processing.
Capture->Upload Documents

Click on Upload Document menu

The documents transaction can be viewed under Validate->View Documents. The details like File Number(the Project ID along with Project Name is displayed in the list box for user to upload the document against the respective Project ID, Uploaded by, Uploaded on, Document Type, File Name, Latest Forwarded details, Date and Time of File Update. The documents can be downloaded or can be opened to view.

The user is able to access the files only which are shared/forwarded to him.
The shared files can be further forwarded to others for further file process by the user who received the file.
Click on View link of a particular record
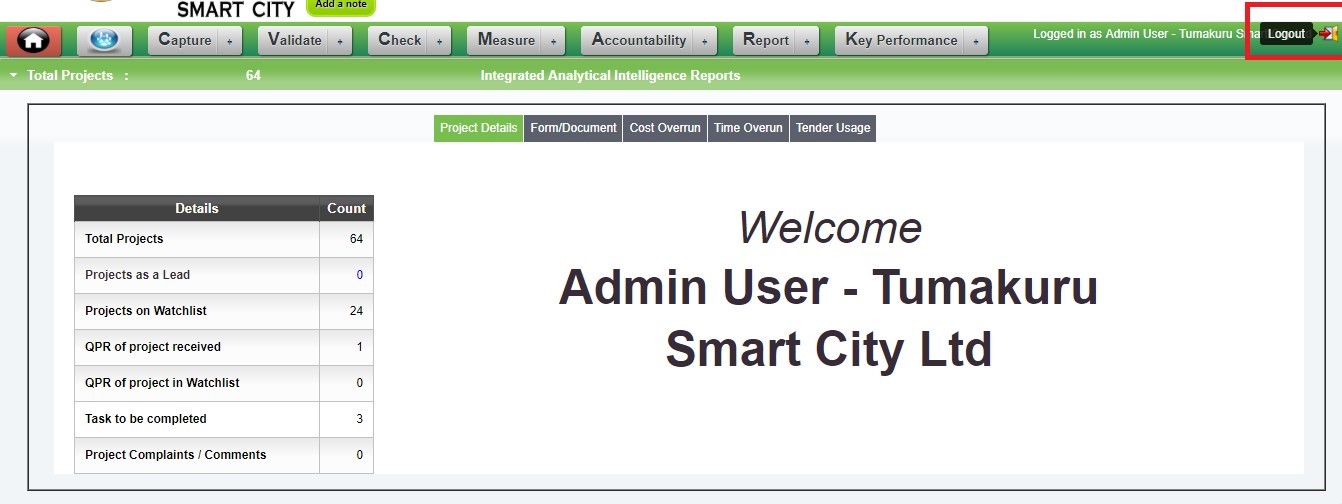
3. Log Out: Exiting from the TSCL GPMS Transportal
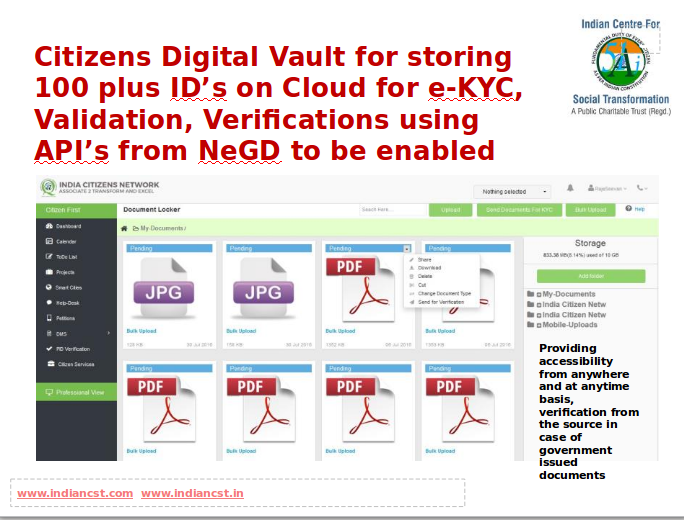
Citizen/User Portal: User is facilitated with the menus such as Personal View and Professional View. Personal View comprises the modules such as PID Verification, Calendar, To Do Lists, Petitions and Document Management System etc.
Professional View consists of GPMS and FMS modules.
Visit http://www.smartcitytumakuru.in/ and click on the menu PMU for Tumakuru Smart City GPMS Transportal
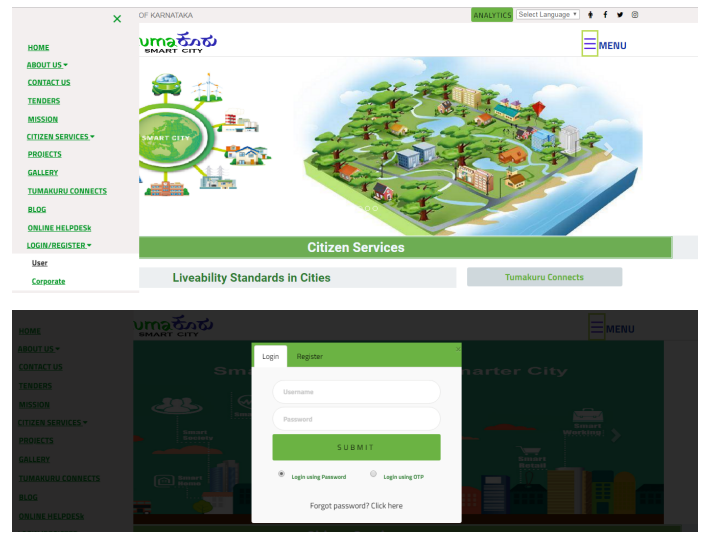
Login as a User with user credential
Personal View:
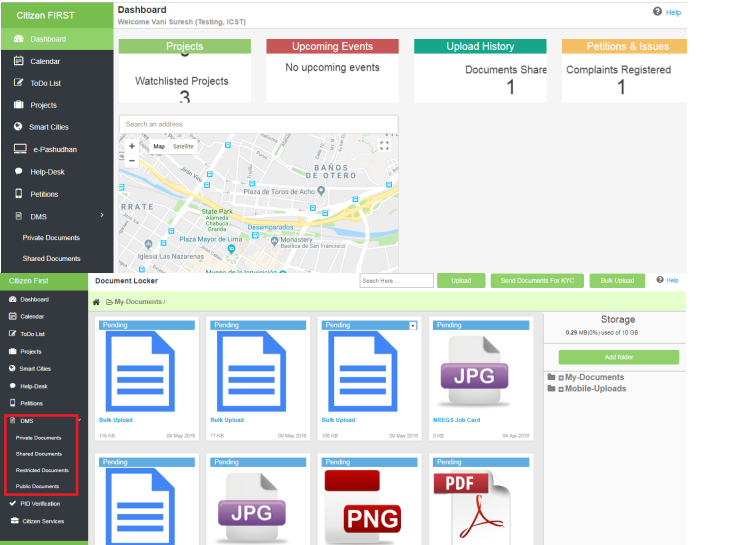
DMS: Here User can maintain his documents as Private, Public, Shared and Restricted Documents:
Steps:
1.1 Create Folder
1.2 Upload the Documents in appropriate mode
Projects: This menu helps citizen to view the Government Projects running in his locality/area
2. Projects: This menu helps citizen to view the Government Projects running in his locality/area
Professional View
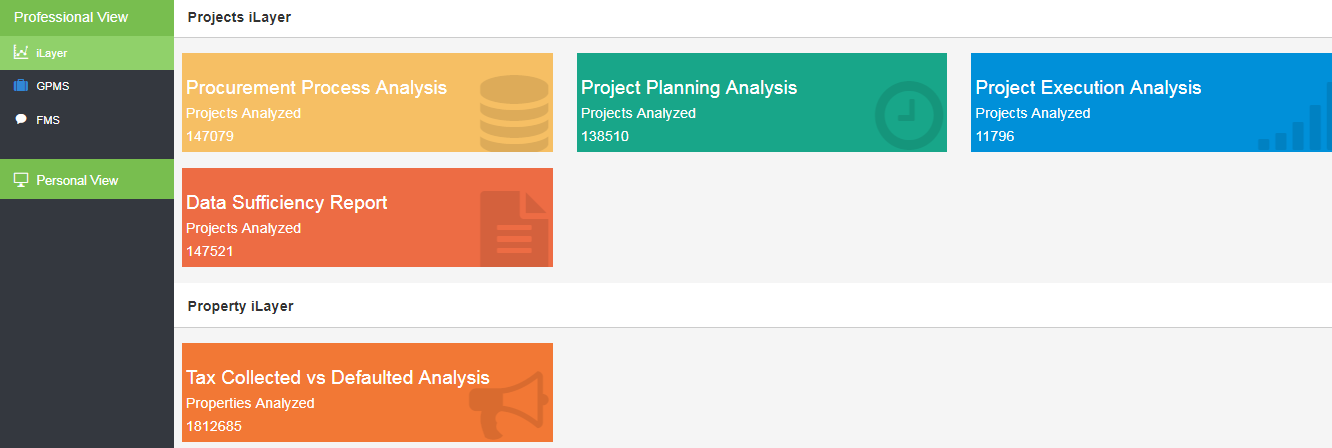
1.GPMS: This module helps the user to maintain his personal projects
2.FMS: This module helps the user in generating Receipts.
*Subjected to Change


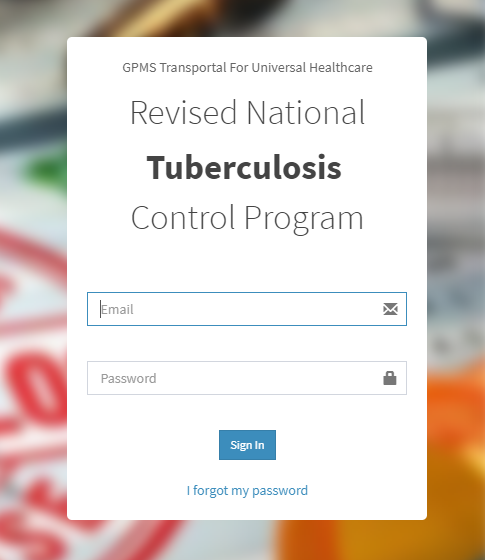
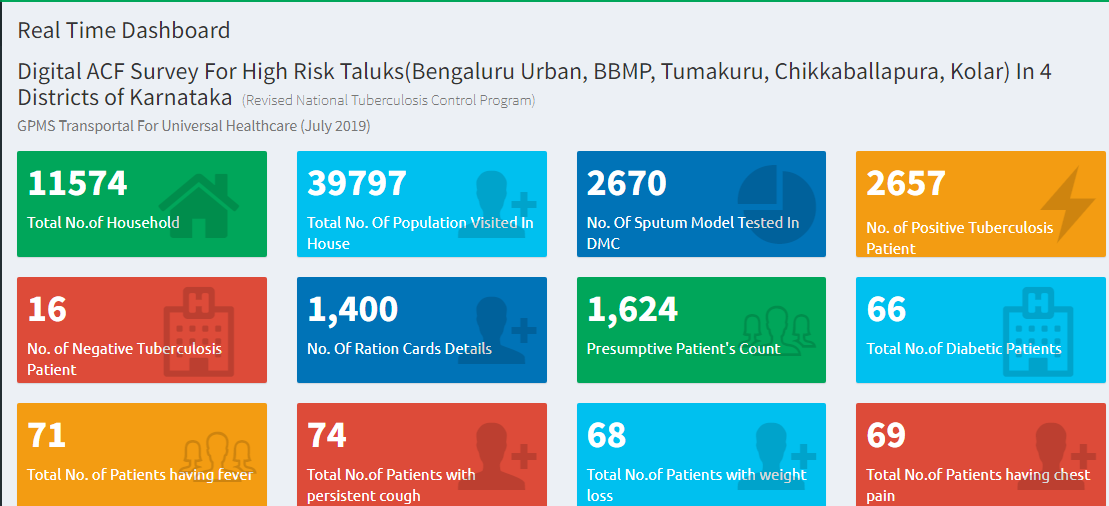
The Government of India’s latest National Strategic Plan (2017-2025) hereinafter NSP, has set a target for eradicating Tuberculosis (TB) by 2025. One of the priority areas1 mentioned in the NSP is Active Case Finding (ACF) among key populations (seeking out people in targeted groups). This process helps in initiating treatment promptly, help identifying the missing million and putting them back into the treatment regime.
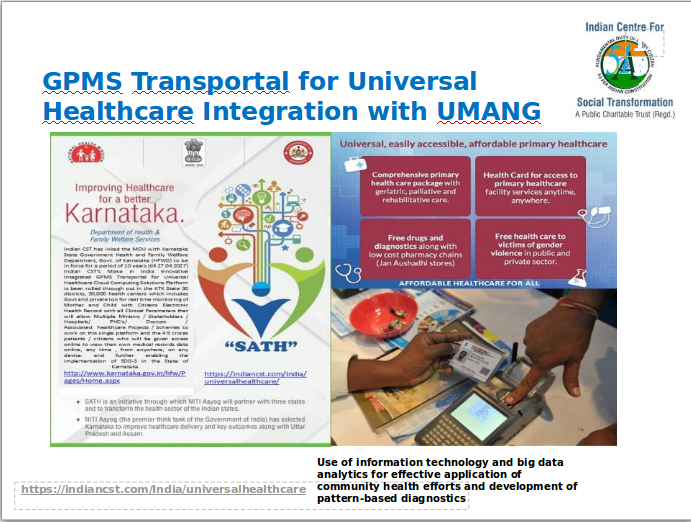
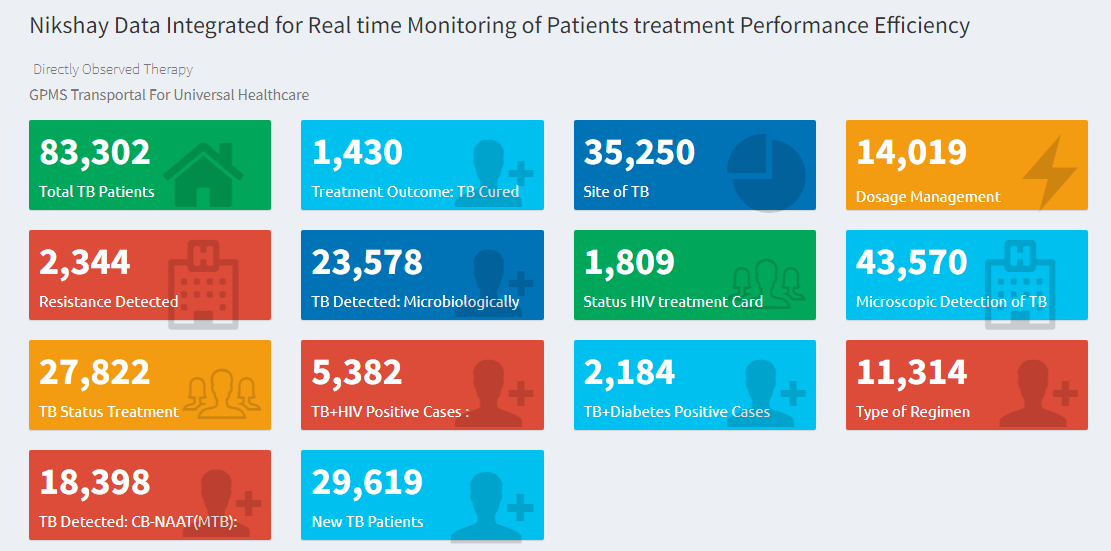
The Government of India has emphasized on utilizing Information Communication Technology (ICT) tools for strengthening TB surveillance especially during Active Case Finding (ACF) – TB Survey that is done twice a year. This step will ensure a sound strategy for identification, treatment and prevention of spreading of the disease among key population. It is in this background that certain interesting discoveries emanating from the cloud and mobile based digital transformation work being done in the State of Karnataka by a ten year old registered Public Trust in Bengaluru, Indian Centre for Social Transformation (Indian CST) (Darpan ID KA/2018/0218715) has merited focused attention.
Indian CST has an MOU with Govt. of Karnataka’s Department of Health and Family Welfare Services (Government Order: NO HFW 76 FPE 2017, Bangalore Dated: 06/5/2017) and is developing/customizing its innovative platform called GPMS Transportal for Universal Healthcare Common Integrated Dashboard for decision support system in Universal Healthcare.
This concept note is prepared to set up a proof of concept to design and develop a comprehensive questionnaire to gain insights into the clinical and family history, socio-economic, demographic and anthropometric details of individuals for the eradication of TB by 2020 in a district. One among the three districts Yadgir, Tumakuru and Raichur is suggested in the State of Karnataka. Logistically Tumakuru being closer to Bengaluru is preferred in this regard.
PROJECT SCOPE
● Understanding the data flow that has taken place during the ACF – TB Survey January 2019.● Development/Customization of the ACF – TB Survey forms and reports so that it enables to gain
further insights into the clinical and family history, socio-economic, demographic and anthropometric details of individuals.
● The GPMS Transportal Universal Healthcare Common Integrated Dashboard developed/customized by Indian CST will facilitate digital data acquisition from various stakeholders that are involved in this process.
DELIVERABLES
●Digital copy of the clinical and family history, socio-economic, demographic and anthropometric data of the above individuals collected by questionnaire, in excel or any other suitable format for the eradication of TB in a particular district in the state of Karnataka.● Demonstration of Scaling up capability for all the other districts in the State of Karnataka as well as in the Country starting with the Aspirational Districts. (Fine tuning of the next project proposal).
● Line data made available to medical experts.
● Line data made available to researchers.
● Validation of the GPMS Transportal for Universal Healthcare Common Integrated Dashboard
ROLES AND RESPONSIBILITY
INDIAN CST
● Will be responsible for customization/enhancement/maintenance of the GPMS Transportal for Universal Healthcare Common Integrated Dashboard.
● Will maintain a help desk to hand hold and coordinate with various stakeholders including for Digital Data Acquisition/Curation/Analysis

Initiative by the Ministry of Health and Family Welfare, Govt. of India, NITI AAYOG, Govt. of Karnataka Powered by Indian CST.
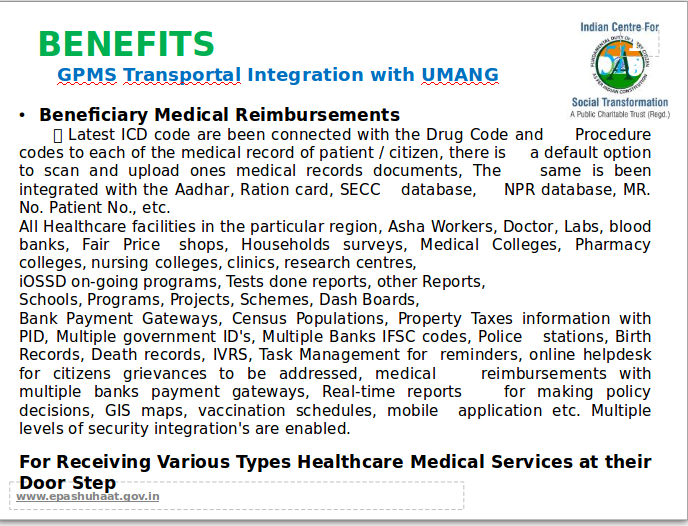
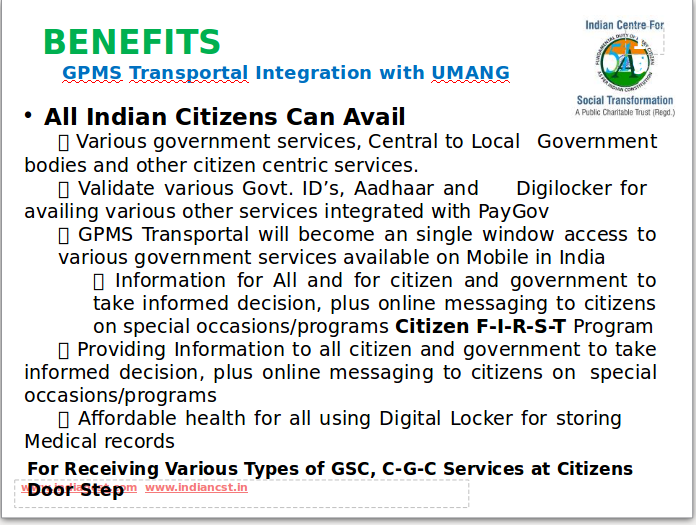
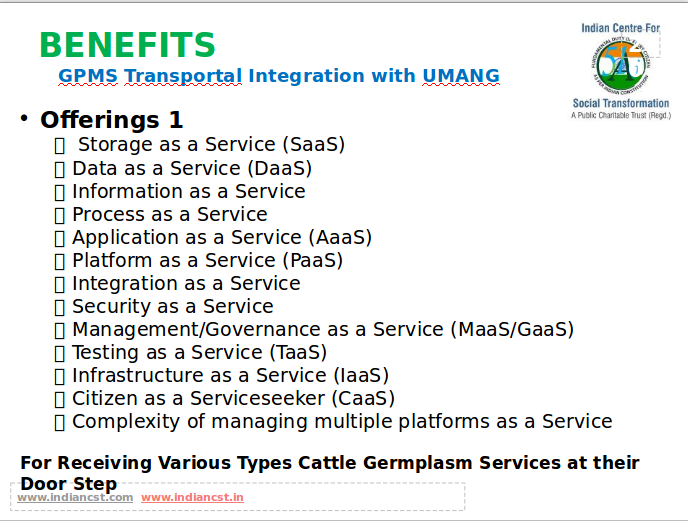
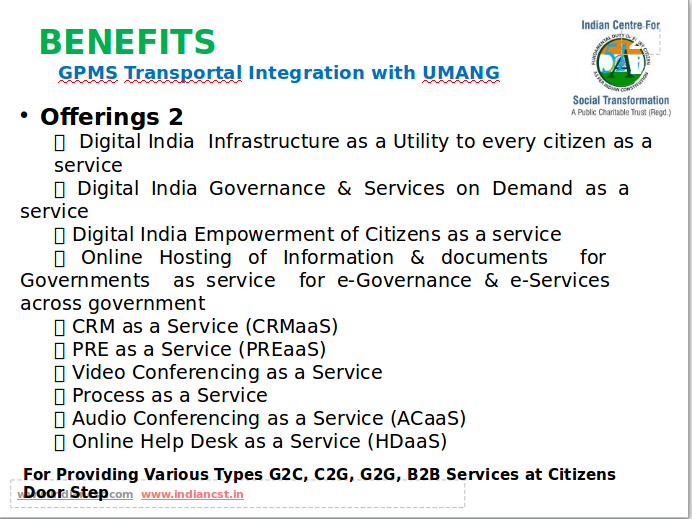
UMANG
Unified Mobile Application for New-age Governance (UMANG) is a Digital India initiative launched by National e-Governance Division (NeGD), Ministry of Electronics and Information Technology. UMANG provides access to major citizen-centric services, offered by Central and State Government departments, Local bodies, and other utility services from organizations primarily through a single mobile App (all mobile platforms via Android, iOS and Windows) and Web. However, particular services may be made available on Pull SMS and/or IVR if the respective departments want to provide their services through any such channels. With UMANG, you do not need to download multiple mobile apps for availing services of different government departments. You can easily navigate and access multiple government services on one app with uniform experience.services on one app with uniform experienceService Provider On UMANG :
A service provider can be a Central and State Government department or a local government body. These government bodies aim at providing instruments for accessing and availing various utility services. In future, citizen-centric services offered by non-government entities can also become service providers.Services On UMANG
UMANG aims to provide major government services. The Onboarding of different citizen-centric government services on UMANG is envisaged to be a continuous process that will result in increasing numbers of such services on UMANG with the passage of time. Target is to provide more around 1200 services sourced from various department applications.Customer Support on UMANG:
If you are facing trouble with a service availed on UMANG, you can contact the UMANG customer support team through the “Help and Support” section of the UMANG application. You can “drop a query” or “live chat” with our customer care representatives inside the app. Further, you can directly call at Toll Free Number – 1800-115-246 or drop an email [email protected]. You can also submit your feedback using Submit Feedback option available in the Settings section of the UMANG application.UMANG customer support team strives to get your concerns addressed at the earliest. Still, if you haven’t got a response from us. You can contact us using any other medium such as:
● Live chat
● Email support
● Phone support
● Post a Query using the app
If you are trying to resolve your issue through email or phone, ensure that you use the correct email address and phone number, respectively.